⚠ Infection zone · field manual
Field manual
Everything the game does, written down. You lead a small group of survivors: find an abandoned camp, raise walls before the second night, keep people fed, rested and loyal, and decide what to do when things go wrong.
Getting started
Getting started
Holdout runs in a desktop browser with a keyboard and mouse. The world behind the start menu is already a live game, so the menu shows your first morning.
The start menu
- Continue appears when a save exists and loads the most recent one.
- New game opens the setup screen: start, difficulty, map size and seed.
- Load game lists every save slot, with a 🗑 button to delete one.
- Settings: graphics quality (Low, Medium, High, Ultra) and sound.
- Quick start on Survivor difficulty starts the Roadside game that is already running behind the menu: Survivor settings, a 640 m map and a random seed.
Starts (scenarios)
| Start | Tag | Description |
|---|---|---|
| 🚗 Roadside | Balanced | Your car died on the road. You and three strangers with makeshift weapons. |
| 👨👩👧 Family | Emotional | Your partner and two teenagers. Fiercely loyal, poorly armed, and every loss cuts deep. |
| 🎖️ Military remnant | Hard start | Three soldiers with rifles and plenty of ammo — but almost no food, and discipline is cracking. |
| ⛓️ Prison break | Risky crew | Four ex-convicts. Brutal in close combat, no guns, and not everyone can be trusted. |
| 🐺 Lone wolf | Recruitment | Just you. More survivors are scattered out there — find them before the dead do. |
What each start changes:
- Roadside: you have a pistol with 12 rounds of 9 mm (20 more in the camp store) and a machete as a sidearm. Three companions carry a knife, a bat and a crowbar. The stash holds a hatchet, a pickaxe, a hammer, two bandages and a leather jacket. The camp stock is 14 food, 20 ammo, 2 medicine, 6 cloth and 12 water.
- Family: your partner is Kind-hearted plus Hard Worker or Tough, has 90 morale and loyalty, and carries a knife. Two children aged 13 to 17 have 70 health, low skills (at most 3) apart from Scouting 4 to 6, are unarmed, and have 95 loyalty. You get +10 food, 10 less ammo, a backpack and a bandage instead of the jacket.
- Military remnant: three soldiers with hunting rifles, knives, riot vests, 30 rounds of .308 each, Shooting 6 to 8 and Melee 5. Each is Brave or Tough, and each has a 60% chance of also being a Hothead, Saboteur or Glutton. The camp starts with 4 food, 50 .308 rounds, 10 of 9 mm and 4 medicine.
- Prison break: four Tough ex-convicts, each also a Thief or a Hothead, some (30%) a Saboteur, with Melee 6 to 8 and Shooting 1. They carry a crowbar, a bat and a knife. You carry a machete and no gun. No ammunition of any calibre, and food is 8.
- Lone wolf: just you. Five extra survivors are hidden in the wild or in cabins at least 45 m from the start. You get +4 food and a crowbar.
Difficulty
| Preset | Zombie density | Aggression | Loot | |
|---|---|---|---|---|
| Story | 0.6× | 0.75× | 1.5× | Fewer, duller dead and fuller cupboards. For the drama. |
| Survivor | 1× | 1× | 1× | The intended experience. |
| Nightmare | 1.5× | 1.35× | 0.6× | Crowded, alert dead and empty shelves. |
The three sliders can be set freely (zombie density 0.4× to 2×, aggression 0.5× to 1.8×, loot 0.3× to 2×). Any other combination shows as Custom.
- Zombie density scales the dead already on the map, how fast new wanderers appear, and the size of every horde. The Story preset keeps its countryside at 0.6 but its night hordes at half size (0.5).
- Aggression multiplies how far the dead can see. Below 0.9×, the dead also deal only 60% damage.
- Loot scales the resources found when searching crates, wrecks and landmarks. Below 1×, found items are sometimes lost too.
- Last stands. When you (the leader) would die, you survive with 30% health, 3 seconds of invulnerability, and every zombie within 4.5 m is shoved back. You get 3 last stands if density is below 0.8× or aggression below 0.9×. You get none if density is above 1.2×. Otherwise you get 1.
Ironman
Ironman keeps a single save slot. It saves at dawn, when you quit, and when the page closes. Quickload (F9) is disabled. The save is deleted when the group is wiped out.
Map size and seed
- Map size: Small (384 m), Medium (512 m), Large (640 m, the default), Very large (768 m) or Huge (1 km). Bigger maps have more towns, farms, cabins, camp sites, rivers, lakes, mountains and dead, and longer walks between them. Up to 768 m everything grows with the area. A Huge map is emptier between places: up to 13 towns, 14 farms, 7 mountains and 3 rivers, and a larger pool of dead (560 wanderers instead of the 780 its area would call for). It also takes a few seconds longer to generate.
- World seed: numbers are used directly and any other text is hashed into a number. The same seed gives the same map. 🎲 rolls a new one.
Graphics
Quality can be changed in Settings or the pause menu. If frames take longer than about 19.5 ms, the game lowers the render resolution automatically (down to 55%), and it raises it again when there is headroom. F3 shows frame rate, draw calls, resolution and the zombie count.
Controls
Controls
You play the leader directly and command everyone else. Keys don't fire while you are typing in a text field.
The leader
| Input | Action |
|---|---|
| WASD or arrows | Move (3.9 m/s). While driving, these steer and accelerate. |
| Mouse | You always face the cursor, twin-stick style, so you can back away while you swing or shoot. Walking backwards is as fast as walking forwards. While you chop, mine or search, you face the work. |
| Hold Shift | Run (5.6 m/s). You can't run while sneaking. |
| Left mouse | Attack toward the cursor. A gun fires. A melee weapon or fists swing in a forward arc. When the magazine is empty you reload (it takes a moment; hold on, you can't fire meanwhile). If both your pocket and the camp store are out of your gun's calibre, or it breaks, you switch to the sidearm by yourself. |
| Q | Swap between your gun and your melee sidearm. |
| E | Interact with what is next to you: talk to a survivor, claim a camp, search a crate or wreck, chop a tree, break a rock, pick berries, strip a wreck for scrap, search a body, pickpocket a dozing zombie, get in, out of or repair a vehicle, burn a spore nest, search a landmark for records. Work by hand (see Working with your own hands): build or finish a blueprint (paying for it from the stock if it isn't paid yet), repair a damaged structure, cook at the kitchen, craft or research at the workshop, work a farm or production station, patch up someone who is hurt. One press starts the job; it goes on until it's done or you move. E again stops it. |
| H | Heal yourself with a medkit or bandage from the stash. |
| G | Throw a molotov (needs one in the stash). |
| V / N | Throw the selected lure / switch to the next lure type in the stash. |
| X | Sneak on or off. Your escort sneaks with you. |
| Z | Change the escort formation (wedge, column, line). |
| F | Flashlight on or off. It only shines when it's dark, and the dead in its beam can see it (Light at night). |
Selecting and ordering people
| Input | Action |
|---|---|
| Left-click a person | Select them and open their details. Shift-click adds to the selection. |
| Ctrl + drag | Box-select your people. Hold Shift to add to the current selection. |
| Right-click (quick) | Give the obvious order for what is under the cursor (see Orders). With nobody selected, a quick right-click on a building shows its details. |
| Hold right-click, or Alt + right-click | Open the order menu. With nobody selected, it shows the leader menu. |
| F1–F4 | Select squad 1 to 4. Press twice quickly (within 0.4 real seconds) to also move the camera to them. |
| Shift + F1–F4 | Assign the selected people to that squad. |
| Hold Alt | Show every name tag. |
| Esc | Closes, in order: an open order menu, build mode, the selection, open panels. If nothing is open, it opens the pause menu. |
Camera and time
| Input | Action |
|---|---|
| Mouse wheel | Zoom. |
| Middle mouse drag | Pan the camera away from the leader. |
| C | Recenter the camera on the leader. Moving the leader recenters too. |
| Click the minimap / an alert | Jump the camera there. An alert must have a location. |
| Space | Pause or resume. The game also stops while a decision card is open. |
| 1 2 3 | Game speed 1×, 2×, 3×. These also unpause. |
Panels
| Key | Panel |
|---|---|
| Tab | Group (roster): what each person does and is doing now, health, morale, night shift. Click a job to assign jobs on the Jobs board; 💤 rests the tired. |
| Shift+Tab | Jobs board: every job as a column of faces. Drag people between jobs, give them a 2nd job and set its share of the day (see The jobs board). |
| B | Build menu. |
| I | Items: the camp stash, everyone's gear and the whole group's, with drag and drop, filters and quick actions (see The Items screen). Its List button shows the old stash list. |
| Enter | The person screen of the selected person (with nobody selected: your own). In it [ ] switch tabs and , . step through the group (see The person screen). |
| T | Technology & progression: eras, research, production chains, defence upgrades, specialisations. Its Crafting orders… button opens the workshop panel (inventions and the craft queue). |
| L | Camp laws. |
| K | Factions. |
| M | Outbreak journal: clues, theories, endings, landmarks, notes from the dead. |
| Shift+M | The big map: the whole valley as you know it, your trail, your people's reported trails, what you know about others, and your own pins (see The big map). |
| Shift+G | Goals: the camp's goals in order, what stands in their way and the plans to get past it, what the group proposes, the planner and the herd watch (see Goals & the planner). G alone still throws a molotov. |
| Shift+N | Plan a mission: send people out to scout, scavenge, clear, rescue, trade, recruit, carry or run an errand (see Missions). |
| O | Pin or unpin the radio log. The ⏻ button on the radio switches it on or off. |
| J | The leader's journal. Its top entry links to every While you were away brief. |
| U | Party: who travels with you, and who runs the camp while you're away (see Your party). |
| Y | The chronicle (timeline and photos). |
| P | Photo mode: drag to orbit, wheel to zoom, WASD to move, Enter to take a photo, P or Esc to leave. |
| Esc | Closes the top window (the person screen, Items or Chemistry) in one press; with none open, clears the selection, closes panels, then opens the pause menu. |
| HUD buttons | 🫂 Chemistry (in the Group panel's header), 🗺️ Map, 🗂️ Jobs, 🎒 Party, 📜 Rules (standing rules), 🧭 Expeditions, 🧪 Outbreak, 🤝 Factions, ⚖️ Laws, 📻, 📓, 🎞️, 🧵 Threads (the storylines). |
| F5 / F9 | Quicksave to slot 1 / quickload slot 1. In Ironman, F5 saves to the Ironman slot and F9 is disabled. |
| F3 | Performance overlay. |
Build mode
| Input | Action |
|---|---|
| Left-click | Place the blueprint. Hold Shift to keep placing the same building. |
| Drag (walls) | A straight line of wall sections. Release to plan them. |
| Shift + drag | A rectangle of walls, snapped to whole sections. |
| Alt + drag | An arc around the camp centre, at the radius where you started dragging. |
| Shift + Alt + drag | A full ring around the camp centre. |
| R / Shift+R | Rotate by 15° / by 90°. |
| Right-click | Remove an unbuilt blueprint under the cursor, or leave build mode. |
| Esc | Leave build mode. |
A line of walls can be up to 120 sections long. Green ghosts can be built. Red ghosts show why not: blocked, overlapping a structure or blueprint, ground too steep (more than 1.6 m of height change under the footprint), outside your territory, research missing, or "only one allowed".
The first two days
The first two days
You start on Day 1 at 08:00 by a dead car on the road. A broadcast mentioned an abandoned camp to the north. The first real horde arrives on the night of Day 2.
Objectives, in order
- Find an abandoned camp. The minimap marks a dashed "camp?" circle near it; any gold ? on the minimap is an unexplored place.
- Claim the camp: walk to the old campfire and press E.
- Give your people day jobs (Tab). You need a Woodcutter and a Builder.
- Close the perimeter before nightfall on Day 2.
- Survive the night of Day 2 (until 06:00 on Day 3).
- Build a Watchtower and post a Guard in it.
- Keep the camp clean: assign an Undertaker or build a Burn Pit.
- Build a Workshop and complete an invention.
- Grow the group to 8 survivors.
- Survive until Day 10.
Finish all ten and the game tells you "You held out". You can keep playing.
Day 1
- The camp lies about 100 to 150 m north of the start (a little further on bigger maps). Every zombie within 60 m of the start is dozing in the morning sun. Four squatters stand in the camp itself.
- Your three companions start on the Escort job and follow you. Before the camp is claimed, anyone given a normal day job just follows you ("Following (no camp yet)").
- On the way, press E at crates and wrecks to search them, and at trees and rocks to gather. Once a camp is claimed, what you carry goes into storage when you walk within 3 m of a storage shed (or of the camp centre, if there is no shed).
- Survivors hide around the map. When one comes into view you get an alert. Walk up and press E to talk.
- Claiming the camp gives you what the people before you left (see Ruined camps): usually a quarter to half of the old palisade in some state, a watchtower or two, a firing platform, a sandbag nest by the gate, often a storage shed or a tent, and the campfire. It also plans every missing section and the gate (if it's gone) as blueprints, and opens the roster. If there is room, an old well (60% health) is found inside and gives 1 water per hour. Your escort switches to Rest so you can hand out jobs.
- At 18:00 you are warned that dusk is coming. At 19:00 the outside crews come in: woodcutters, quarriers, scavengers, undertakers, haulers, fishers and water carriers stop and walk to the fire, and so does anyone still outside the camp (the roster says "Curfew at dusk"). Guards, patrols, your escort, people on orders and anyone on the night shift carry on. From 20:00 to 06:00 is night: workers go to bed.
- Two old spears still lean by the gate when you claim the camp. Their long reach strikes over the palisade: give them to whoever will hold the wall.
- For the first two days the new dead turn up at least 70 m from the camp (30 m after that).
- Night 1: a small horde of 5 comes for the camp, in two groups at 21:00 and 23:00. If you haven't claimed a camp, a smaller group (about a third of that) heads for wherever you are instead.
Day 2
- Keep woodcutters cutting and builders building. Each palisade section costs 8 wood. Builders take the perimeter first.
- Give your woodcutters and quarriers a 2nd job (Builder is a good one while there are blueprints). Trees never run out, so a woodcutter would never build otherwise; with a 2nd job they build for part of every day (70/30 to start). Drag them onto the Builder column's 2nd strip on the jobs board (Shift+Tab).
- The HUD counts down to the Day 2 horde. At 20:00 on Day 2 you are told whether the perimeter is closed or how many gaps it has.
- Night 2: 14 of the dead, in two waves (21:00 and 23:00). A night's size is then 8 + 5 × the night (+ up to 4 for the stench). Nights 3 and 4 bring 15% more in three waves (21:00, 23:00, 02:00); nights 5 and 6 bring 30% more in four waves (21:00, 23:00, 01:00, 03:00), and from night 7 half again as many. Each wave comes from its own direction, 55 to 75 m out, is scaled by the difficulty (Story halves them) and is capped at 120.
- At the wall, the dead that crowd one section drift along to a quieter or weaker one, or to a gap they can see. One of them clawing at the logs barely marks them; five or more leaning on a section bring it down fast. Close the gaps, spread your fighters, and repair between waves.
| Night | 1 | 2 | 3 | 4 | 5 | 6 | 7 |
|---|---|---|---|---|---|---|---|
| Survivor | 5 | 14 | 26 | 32 | 43 | 49 | 65 |
| Story | 3 | 7 | 13 | 16 | 21 | 25 | 33 |
| Nightmare | 8 | 21 | 39 | 48 | 64 | 74 | 97 |
Survivors
Survivors
Each person has a name, an age (18 to 62), a backstory, ten skills, one to three traits, health, morale and loyalty. The group can grow to 30.
Skills
Skills run from 1 to 10. Everyone starts with 1 to 3 in each, plus two strengths (sometimes three) at 4 to 7. The leader always has at least 4 in Shooting, Melee and Scouting. Skills grow with use: chopping trains Woodcutting, building trains Building, shooting trains Shooting, and so on.
| Skill | What it affects |
|---|---|
| 🎯 Shooting | Accuracy and fire rate with guns and crossbows. |
| 🗡️ Melee | Damage and speed in close combat. |
| 🪓 Woodcutting | How fast trees are felled. |
| ⛏️ Mining | How fast stone is quarried. |
| 🔍 Scavenging | Search speed and loot quality in ruins. |
| 🔨 Building | Construction and repair speed. |
| 🩺 Medicine | Healing speed; treating bites. |
| 🛠️ Crafting | Research and crafting speed at the workshop. |
| 🌱 Farming | Food produced on farm plots; cooking. |
| 👁️ Scouting | Sight range and hearing distance. |
Work speed is 0.45 + 0.11 × skill. That is multiplied by the matching tool bonus, Hard Worker (+25%) or Lazy (−25%), morale (0.7 + morale / 333), and every bonus or penalty from needs, weather, perks and quests.
Traits
Hidden traits show as ??? until they reveal themselves. Some reveal through their own events (a thief is caught, a saboteur hacks a wall). A lazy person may be found out at the start of any day (25%), a glutton when food runs short, and a coward when the dead come close. Asking someone about their past, questioning a stranger at the gate, or a confession reveals them too. Pairs that can't appear together: Hard Worker/Lazy, Brave/Coward, Tough/Frail, Kind-hearted/Hothead. The leader never has a bad trait.
| Trait | Good? | Hidden at first? | Effect | Votes |
|---|---|---|---|---|
| Hard Worker | good | no | +25% work speed. | middle |
| Lazy | bad | yes | -25% work speed. | middle |
| Brave | good | no | Never flees. +10% combat damage. | middle |
| Coward | bad | yes | Runs from zombies when not a guard. | middle |
| Sharp Eyes | good | no | +30% sight range. | middle |
| Keen Ears | good | no | +60% hearing distance. | middle |
| Night Owl | good | no | Sees well at night; happy on night shift. | middle |
| Charismatic | good | no | Raises the morale of everyone nearby. | lenient |
| Hothead | bad | no | Starts arguments. Votes harshly. | harsh |
| Glutton | bad | yes | Eats double rations. | middle |
| Thief | bad | yes | Steals supplies when loyalty is low. | lenient |
| Saboteur | bad | yes | Secretly works against the group. | lenient |
| Loner | bad | no | Morale drops when the group is large. | middle |
| Kind-hearted | good | no | Votes for mercy. +morale for others. | lenient |
| Tough | good | no | +35% max health. Resists bites. | middle |
| Frail | bad | no | -25% max health. | middle |
| Quiet | good | no | Makes half the noise while working. | middle |
The "Votes" column is how the trait pulls that person's vote in group decisions (see Decisions).
Day jobs
Set jobs in the roster (Tab) or in a person's details. A job whose building is missing shows "needs …", and the person rests until it exists.
| Job | Skill used | Needs | What they do |
|---|---|---|---|
| 🛡️ Escort | Melee | — | Follows the leader and fights beside you. |
| 💤 Rest | — | — | Stays by the fire. Slowly recovers morale. |
| 🪓 Woodcutter | Woodcutting | — | Fells trees and hauls wood to storage. |
| ⛏️ Quarrier | Mining | — | Breaks rocks and hauls stone to storage. |
| 🔍 Scavenger | Scavenging | — | Searches ruins and wrecks for scrap, food, ammo and gear. |
| 🔨 Builder | Building | — | Constructs blueprints and repairs damaged walls. |
| 🔫 Guard | Shooting | — | Mans watchtowers and the gate. Stays up at night. |
| 🔦 Patrol | Scouting | — | Walks a loop just inside the walls and deals with anything that gets close. Tick 🌙 to patrol at night. |
| ⚰️ Undertaker | — | — | Drags zombie corpses far from the gates (or to the burn pit). |
| 🧺 Hauler | — | — | Recovers gear and supplies left in the world (fallen people, dropped bags) and brings them to storage. |
| 🍲 Cook | Farming | Kitchen | Stretches food (-40% consumption) and lifts morale. |
| 🩺 Medic | Medicine | — | Heals the wounded. Much better with an infirmary. |
| 🛠️ Crafter | Crafting | Workshop | Researches inventions and crafts items at the workshop. |
| 🌱 Farmer | Farming | Farm Plot | Tends farm plots to grow food. |
| ⚙️ Artisan | Crafting | — | Staffs production stations: sawmill, forge, smokehouse, tailor, greenhouse. |
| 🎣 Fisher | Farming | — | Fishes from the shore of the nearest known river, lake or pond. Much better with a Fishing Rod. |
| 🪣 Water Carrier | — | — | Fetches raw water from the nearest known river or lake. Boil it (campfire) or filter it before drinking. |
- 2nd job. Anyone can have a second job. It gets a share of the day, not only the gaps: by default 70/30, in blocks that cycle every 6 game hours (so about 2 hours on the 2nd job at a time; everyone's blocks are staggered, so a camp's builders don't all down tools at once). Other splits: any share from 10% to 90%, mornings / afternoons (main job until 13:00, 2nd job after), or only when idle. Whichever job is on, when it has nothing to do or something blocks it, the other one fills in for at least 20 seconds ("(helping as …)" or "(2nd job has nothing to do)" in their task). Nights (20:00–06:00) always belong to the main job. Before switching, they bring their load to storage and finish taking out a body they are dragging, then let go of their tree, rock, building site or post. Their task reads "(2nd job)" while on it.
- Night shift (🌙 in the roster) keeps someone working through the night. Fatigue builds 40% faster on night shift.
- Woodcutters and quarriers only look for trees and rocks within 95 m of the camp. Scavengers only search places that have already been explored (up to 200 m from camp). A roster warning tells you when there's nothing left.
- Everyone carries up to 12 units (plus their pack) and hauls it to the nearest storage shed, or to the camp centre if there is none.
- Fishers and Water Carriers work the shores of rivers, lakes and ponds you have explored: see Water and fish.
- Guards take the best free post: tall towers first, then platforms, then sandbag nests, then the gate. With no post they patrol inside the walls (someone who lost a leg keeps watch by the fire instead).
- Patrols walk a loop of waypoints about 2.5 m inside the walls of the home camp, one after the other (a waypoint they can't reach is skipped). They chase down anything that gets inside the walls and shoot at the dead outside from where they stand. Tick 🌙 for them to patrol at night.
- The night watch is never empty. From 19:30, a claimed camp with 3 or more people at home always has at least one guard, and with 5 or more also one patrol. If nobody is assigned (or the one assigned is sick, grieving or too tired) the camp picks the most rested suitable person: rested, armed, not in your party, not on a manual order, not the one who stood last night's watch unless nobody else can. They get a 🌙 chip, take the night shift, and are relieved when fatigue passes 78 (someone fresher takes over). At 06:00 they go back to their old job after a short morning rest by the fire (to about 09:00, or sooner once they're rested). The watch is shared out: whoever stood last night goes to the back of the line, and so, a little, does whoever has stood the most nights. A stranger taken in on probation stands the watch every night of it (🌙⏳), on top of the rota. The standing rule Guards at night raises the minimum number of guards; the automatic minimum is one.
- Gun users in camp are topped up to 12 rounds every hour from camp stock, and to 18 when they drop off a load.
- The roster's "Can't work" filter lists everyone who is blocked, with the reason.
The jobs board
The Jobs board is where jobs are assigned. Press Shift+Tab or the 🗂️ Jobs button, or click someone's job in the Group panel (it opens the board with them picked), or 🗂️ Jobs on their person screen. Every job is a column of faces, grouped as Gather, Build & make, Defend & care and Camp.
- Drag a face onto a column to make that their main job. Drop it on the column's blue "2nd" strip to make it their 2nd job. No drag? Click a face to pick the person, then click a column (or its 2nd strip).
- Each column says what the job needs right now: "📐 3 blueprints waiting", "⚰️ 12 bodies near camp", "🌲 140 trees in reach", "No kitchen — build one", "No water nearby". Amber columns have work waiting and nobody on it; red ones can't be done yet.
- The number on each face is their skill for that job. A ⚠ marks something in the way: exhausted, bitten, in quarantine, recovering, a lost hand (🦾, 60% at felling, building and quarrying) or leg (🦿, no patrols or party). Hover for details.
- The picked person's bar shows both jobs, the split (a slider from 10% to 90%, or ☀️ AM · 🌇 PM, or 💤 only when idle), a day timeline (amber = main job, blue = 2nd job, dark = night, white tick = now) and ✖ to drop the 2nd job. Clicking the blue bubble under a face on a 2nd strip cycles 30% → 50% → PM → only when idle.
- With someone picked, every column head shows their skill for that job (green: 6+, red: 2 or less) and ✓ / 🧰 for the gear it wants. Their bar adds 🌙 Works nights, their gear for the job with 🧰 Equip for job, 💤 Rest now and 👤 Details (their person screen).
- A 🤝 or ⚡ at the top left of a face: a friend or a rival is on that job too. A 🧰 at the bottom left: they lack the gear for it.
- A person's screen still sets both jobs (Overview); the split stays as it was (70/30 by default).
The person screen
Click one of your people in the world, a face on any card or list, or a name in the Group panel. Or select someone and press Enter (with nobody selected, Enter opens your own screen). The header shows the portrait, name, age, main and 2nd job, the camp they belong to and pills for anything that matters now: known traits (❔ for one you haven't found out), ⚠ why they can't work, 🩸 a bite and the hours left, 🏚️ quarantine, 🎖️ deputy, 🎒 in your party, 🖤 grief, 🦾 / 🦿 a lost hand or leg. The ‹ › buttons (or , .) step through the group; [ ] switch tabs; Esc closes it.
| Tab | What it shows |
|---|---|
| 🧍 Overview | What they are doing now, the day job, the 2nd job and the night shift; health, morale, loyalty and their opinion of you; what moves their mood right now (the fire, grief, working beside a friend or a rival); who they work well with and clash with. Beside it: needs and health, the Body (a bite, the amputation odds, a lost limb) and field orders (rules of engagement, move mode, squad). |
| 📈 Skills & perks | All ten skills as bars (the part-filled block is progress to the next level), their best three highlighted, specialisations next to the skill they belong to, what they are best suited to, and their record (kills, wood, stone, bodies…). |
| 🎒 Gear | The five slots with each item's condition, calibre and what it does; the rounds they carry; their pack (bag finds, resources on their way home). Click a slot to pick, or drag from the From the stash strip (only things they can use: nothing broken, nothing two-handed for someone with one hand). |
| 🫂 Relationships | Their partner, family, friends and rivals as faces (the badge is what they think of that person; hover for both ways), who they like and dislike without a bond, the people they lost, their opinion of you, their personal goal and what they remember. 🫂 Chemistry web opens the web focused on them. |
| 📖 Life before | Their story: before, the first day, since then, what they want and fear, what they've told you or you've noticed. |
| 🕰️ History | Their journal, their memories, what happened between them and others (arguments, rescues, a partner who insisted on coming), and their place in the camp's history. |
The buttons along the bottom: 🛡️ Follow me, ✋ Hold here, 🧍 Escort…, ↩ Back to job · 🎒 Party (or 🏠 Stay at camp), 🎖️ Make deputy / Clear deputy, 🗂️ Jobs (the Jobs board with them picked) · 🎒 Items (their gear in the Items screen), 🩹 Treat, 🪚 Amputate (only for a bitten hand, arm or leg, with today's odds), 🎯 Show, 🚪 Exile… (a card for the group; see Chemistry). Buttons that can't be used say why when you hover them. Gear buttons need you there (within 15 m, or them in your party, and you at their camp for the stash); from afar in contact they turn into 📨 requests by radio, and out of contact their screen shows what you last knew (📡, with how long ago) and nothing can be changed from it. The dead and the exiled keep their screen (story, history) without the buttons.
Working with your own hands
Anything a job does, you can do yourself. Stand next to it and press E: the prompt says what you'll do. One press starts it, the prompt shows your progress, and it stops when the job is done, when you move, or when you press E again.
- Build or finish a blueprint. An unpaid blueprint is paid from the camp stock when you start, like a Builder would (the prompt says what it uses, or what is missing).
- Repair a damaged structure (below 90%): 1 wood per 60 health.
- Work a station: cook at the Kitchen, craft the next queued item or research at the Workshop, farm a Farm Plot, run a Sawmill, Forge, Smokehouse, Tailor or Greenhouse. The job stops when the station has nothing to work with and tells you why.
- Patch someone up who is below 85% health, like a Medic (three times as fast at an infirmary).
Your own skills set the speed (the same formula as everyone's, with your tool), and you gain skill as you work. When a blueprint and a tree or crate are both in reach, the nearer one is offered.
Equipment
Everyone has five slots: Weapon, Sidearm (melee only), Tool (a tool, or a weapon that works as one), Armor and Pack. Click a slot on the person screen's Gear tab to pick from the stash, drag an item onto it, or use Auto-equip best. It scores items by damage, armour, carry space and the tool for the person's job, and avoids guns when the camp has fewer than 10 rounds. Clicking an item in the stash equips it on the open person, else the selected person, else you. Full item tables are under Production → Item tables.
- Armour reduces both damage and the chance of a bite by its percentage.
- The leader shoots from their own rounds first, then straight from the camp stock. Everyone else uses only the rounds they carry.
- Survivors fight with a gun when they have rounds of its calibre and the target is out of melee reach (and not while they reload or clear a jam). Otherwise they use their sidearm or melee weapon, or fists (6 damage).
- Nobody inside the camp stays empty-handed while there is timber. Anyone without a weapon makes themselves an Improvised Club (9 damage) for 2 wood from storage.
The Items screen
Press I or the 🎒 Stash button. Three views:
- 🏕️ Camp stash: the stash as cards (the same item in the same condition stacks, ×n), the camp's resources and storage above them, and everyone at camp beside it with their five slots. Drag a card onto a slot, or onto a face to let the game pick the slot; drag an item from a slot back onto the stash to take it off. No drag? Click an item, then click where it goes.
- 👤 People: a card per person with their slots, the rounds they carry and their bag. Drag between two people's cards to hand something over.
- 👥 Whole group: counts (armed, items, guns, broken, badly worn), who carries what (a row per person, a coloured underline for worn and nearly broken things), rounds by calibre against the guns that eat them (in store, carried, per gun) and Needs attention: the unarmed, guns with no rounds anywhere, broken items with a 🔧 Repair button each.
Filters: All, 🗡️ Weapons, 🛠️ Tools, 🦺 Armour, 🎒 Packs, 💊 Supplies, ✖ Broken. While you drag, the places it can go light up green and the rest fade; dropping somewhere it can't go tells you why.
- You have to be there. Handing gear to someone or taking it off them needs you within 15 m of them, or them in your party. Anything from or into a camp's stash needs you at that camp. The strip under the buttons says where you are and what you can do from there.
- From afar, ask by radio. If you are in touch with them (at camp while you are home, or with two walkie-talkies or a Radio Station: see the deputy), a drop, a pick or a button becomes a 📨 request: the person (or that camp's deputy) does it about half an hour later. Pending requests show in the strip with the minutes left and a ✖ to cancel; when it is done (or can't be done any more) a notice says so. Target slots you could only ask for light up blue while you drag.
- Out of contact, the controls are off and say why ("You're not at Pine Hollow, and out of contact. Walk there…"). You still see the camp and the people, but as you last knew them: the stash and their gear as they were when you were last in touch, marked "📡 last known, 3 h ago".
- Each camp has its own stash (pick the camp at the top of the Camp stash view). A person uses the stash of the camp they are at. Before you have a camp, the stash is the group's packs, within 18 m of you. Every camp-wide button (Equip for jobs, Equip best, Repair broken, Hand out ammo) works on the camp you are looking at: you, at its stash, call everyone at that camp over.
- Reach is real. A person can take from a camp's stash or put into it only while at that camp. Before you have a camp, the stash is the group's packs, within 18 m of you. Two people can hand things over only within 6 m of each other, at the same camp, or when both are with you (you and your party, within 20 m). People away on an expedition or a mission are listed greyed out and can't be reached.
- The rules of the slots hold: a sidearm is a melee weapon, a tool slot takes tools (or a weapon that is one), a broken item can't be equipped, and someone with one hand can't take a two-handed weapon. Whatever was in the slot goes back where the new item came from (the stash, their bag, or the other person's slot if it fits), or into their bag when they are out of camp.
- A gun handed to someone at camp comes with up to 12 rounds of its calibre from the store; a gun taken away at camp puts their rounds back in the store. A bandage or medkit dropped on someone hurt is used on them.
- 🧰 Equip for jobs: everyone at the camp takes what their job wants (see Gear for the job).
- ⚡ Equip best: everyone at camp takes the best the stash has for their job (guards and your party first; one hand: no two-handed weapons; broken things are skipped). Your own kit only has its empty slots filled: what you carry is your call.
- 🔧 Repair broken: every broken item (stash, bags) is queued at the Workshop (up to 12); a Crafter repairs them for scrap (see Wear & repair).
- 🎯 Hand out ammo: rounds of the right calibre for each gun carried at camp, one magazine at a time around the group until everyone has two loads (at least 10) or the store runs out. You draw from the store directly and are left out.
Gear for the job
Each job wants something in hand. A face on the Jobs board missing it carries a 🧰 (hover for what and why); picking someone shows, in every column head, their skill for that job and ✓ or 🧰 for their gear. The person screen says it under their job and on the Gear tab (For the job), and the Items screen on each person's card.
| Job | Wants | Why |
|---|---|---|
| 🛡️ Guard, 🚶 Patrol | a gun with rounds for it, or a long weapon (spear); armour is nice to have | The watch stops the dead at the wall. A gun only counts with rounds of its calibre carried or 6+ in the camp's store. |
| 🎒 Escort (your party) | a weapon (not a club); armour is nice to have | Out there they fight beside you. |
| 🪓 Woodcutter | an axe (Hatchet or Fire Axe) | +40–50% felling. |
| ⛏️ Quarrier | a pickaxe | +50% quarrying. |
| 🔨 Builder | hammer and nails | +50% building. |
| 🔍 Scavenger | a crowbar or scavenger kit, and a pack | Crates and doors open faster; more carried per trip. |
| ⚰️ Undertaker | a coat or jacket | The dead are filthy and some still bite. |
| 🧺 Hauler, 🪣 Water Carrier | a pack | More carried per trip. |
| 🎣 Fisher | a fishing rod | 2.5× the catch. |
| 🩺 Medic | a medkit or bandages in the camp's stores | Treatment uses them. |
🧰 Equip for job (on the person screen, the Jobs board's picked-person bar and the Items screen) takes what is missing from the stash of the camp they are at: the best it has, never a broken one, never a two-handed weapon for someone with one hand, and a gun only if there are rounds for it (else a spear for a guard). 🧰 Equip for jobs in the Items screen does it for everyone at that camp, guards first. The same "you have to be there" rules apply to the buttons.
They also do it themselves. When someone's job changes, and every morning at 06:00 (guards and the night watch first), they take what the job wants from the stash of the camp they are at; someone out of camp does it as soon as they get back. Broken items, two-handed weapons for one hand and guns without rounds are left. Gear you set by hand is marked 📌 kept and never swapped (click 📌 on their Gear tab to let them choose again). A notice says it ("Mila took the fire axe for woodcutting") when you're there or in touch; otherwise it goes into that camp's "While you were away" brief. The night watch picks people with a gun and rounds first, then someone with a long weapon.
Rest
- 💤 Rest now (person screen, the Jobs board, or the 💤 button next to anyone tired in the Group panel): they stop work for 4 hours and rest by the fire (fatigue −4 an hour), or in bed at night. 💤 Rest the tired in the Group panel's header rests everyone with fatigue over 60 who isn't on the watch.
- 🌙 Rest until morning: they stop until 06:00 and skip tonight's night shift; it comes back in the morning. Someone on the night watch is relieved and the watch finds a replacement.
- 🌅 A morning off after a night shift (on by default, per person, switch on the person screen): whoever worked 3 hours or more of the night on the night shift rests from 06:00 to 11:00. The night watch earns its own morning rest (until about 10:00). Both show on the person screen ("Resting until 11:00 (the morning off after a night shift)") and as 💤 in the Group panel.
- ↩ Back to work ends a rest you ordered. An order to rest is spoken: you have to be with them or in touch (at camp while you're home, or by radio); out of contact the buttons are off.
Stances and moving
Each person has rules of engagement and a move mode. Set them in the order menu or under "Field orders" in their details. Chips in the roster show anything that isn't the default.
| Rules of engagement | What they do when the dead come close |
|---|---|
| 🔫 Fire at will (default) | Engage anything they see, like someone who wants to live: inside the walls they never walk out through the gate for one outside, but shoot it from where they stand or strike across the wall from just inside it (the dead can't reach back through the palisade). Outside the walls, when three or more come for them, or badly hurt, they fall back to the walls. |
| 🤫 Hold fire | Stay silent and only fight back in melee when something is on top of them. |
| 🗡️ Melee only | Fight, but never fire a gun. |
| 🏃 Avoid contact | Run from zombies: back to camp if they are more than 6 m out, otherwise straight away from the threat. |
| Move mode | Speed | Effect |
|---|---|---|
| 🚶 Walk | 3.6 m/s (5.4 when hurrying) | Normal noise. Footsteps carry 3 m (7 m at a run). |
| 🥷 Sneak | half speed | Makes a quarter of the noise. The dead only notice them at half their sight range (40% for someone Quiet). |
| 💨 Sprint | 5.4 m/s | Makes 1.6× the noise. |
Anyone carrying more than 8 units moves at 85% speed. Someone dragging a body moves at 65%. In the last 6 hours before turning, the bitten move at 70%.
Health, bites and death
- Health is 100: ×1.35 for Tough, ×0.75 for Frail. Sleeping in camp slowly restores it. Medics heal people below 85%, three times as fast at an infirmary and 50% faster once Field Medicine is invented.
- Bites. Every hit from a zombie has a 6% chance to bite (12% from a Virulent one), halved for Tough people. Teeth have to get through: armour counts two and a half times against bites (a leather jacket stops 37% of them, a helmet 30%, a riot vest 75%), a sandbag nest's cover counts too, and on Story the duller dead bite 40% less. A bitten person turns in 24 hours. When the time runs out there is a 40% chance it was only a scratch. Otherwise they die and rise as a Fresh Turned zombie, still quick on their feet. For a bitten follower a decision card opens (see Decisions). If you are bitten you only get a warning. Antiserum cures a bite.
- Where the bite is. People throw their hands up: about a third of bites land on a hand, a fifth on a forearm, a quarter on a leg, one in eight on the torso and one in twenty on the neck. The card, the roster (🩸 left hand) and the person's Body section say where.
- Amputation. A hand, forearm or leg bite can be cut away: Amputate the hand / arm / leg on the bite card, the 🪚 button in the person's Body section, or the law Amputate limb bites at once. Torso and neck bites can't. The sooner the better: about 85% it stops the infection within the first hour, falling to about 20% at 6 hours and 5% at 12. A Medic at camp adds 5% plus 1% per Medicine level, an Infirmary 5%. It uses 1 medicine; without one the odds are 15% worse and the bleeding worse. About 8% bleed out on the table (14% with no medicine, more for a leg or a Frail person; a medic and an infirmary cut it). The card's hint shows the odds right now. The survivor is left at 45% health, off work for 12 hours ("Recovering from the amputation"), and you're asked whether they wait in quarantine or among you. You don't know whether it worked: if it did, the fever breaks when the 24 hours run out; if not, they turn anyway.
- One hand (🦾). No two-handed weapons (rifles, shotguns, crossbows, spears, fire axes): they go back to the stash and the best one-handed weapon comes out. Pistols and one-handed blades are fine. Felling, building and quarrying at 60%. Auto-equip respects it.
- One leg (🦿). 70% speed and no running. They can't join your party, go on expeditions or patrol; a guard keeps watch only from a post (or by the fire). The 🦾 / 🦿 badge shows on every face in the game.
- Death. Everyone else loses 8 morale (14 if Kind-hearted), and a funeral decision follows. Those close to them mourn for days (see Stories). Whatever the dead person carried or wore drops in a bag where they fell, for a Hauler to recover.
- Losing the leader. The group chooses a successor from the three with the highest loyalty plus morale. This decision opens within 2 real seconds, even during a fight. The game is over only when nobody is left.
Orders
Orders, squads and formations
A manual order overrides a day job until it is finished or you send the person back to work. You can't order the leader or people who haven't joined.
Quick right-click
| Under the cursor | Order |
|---|---|
| A zombie | Everyone selected attacks it. |
| A corpse | The nearest selected person searches it. |
| A tree, rock, crate, wreck or berry bush | Gather or search it. |
| The leader | Come with me (close escort). |
| A hurt survivor (below 50% health) | The nearest selected person carries them to the infirmary, or to the campfire. |
| An unmanned Watchtower, Stone Watchtower or Firing Platform | The nearest selected person climbs up and keeps watch. |
| Ground or anything else | Move there and hold position, spread in a small circle. |
The order menu
Hold right-click (or Alt+right-click). The menu depends on the target:
- Ground: Move here, Sneak here, Sprint here, Move one by one (bounding overwatch, needs 2 or more people), Hold position here, Scavenge around here (searches explored crates, wrecks and plants within 25 m until the area is empty).
- Zombie: Attack. Pickpocket if it carries visible gear (see Looting).
- Corpse: Search the body, Drag it away.
- The leader: Come with me (2.4 m spacing), Follow at a distance (5 m spacing), Bodyguard me. Under More: Come with me (party) puts the selected people in your party for good (Follow job, old job remembered) and Stay at camp sends them home.
- Another survivor: Escort them (bodyguard until told otherwise), Carry them to safety. Under More (also with nobody selected): Come with me / Stay at camp for that person.
- A building: Man this tower (any Watchtower or Firing Platform), Move here, and Upgrade to … when an upgrade is invented.
- Every menu also sets the rules of engagement, assigns to squad 1 to 4, and has Back to their jobs.
- With nobody selected, the menu shows the leader options (Sneak, Formation) and building or person details.
A person's details panel also has buttons: Follow me, Hold here, Escort… (choose anyone), Back to job, and Show (moves the camera to them).
Escort and bodyguards
- Escort as a day job, or a follow order, puts people in your formation. Z cycles wedge, column and line. When you sneak, your escort sneaks too.
- Bodyguard / Escort someone: the guard stays on the protected person's flank, about 2.5 m away. They fight anything within weapon reach of that person (guns: up to range + 2 m, max 24 m; melee: 10 m), but never stray more than 14 m. The order ends if the person dies or leaves.
Bounding overwatch ("Move one by one")
The group splits into two halves. One half advances up to 7 m toward the target, fanned out sideways, while the other half holds and covers. Then they swap. A leg that can't be finished within 12 seconds is ended anyway. Once everyone is within 3.5 m of the target they stop and hold in a circle.
Squads
Up to four squads. Shift+F1–F4 assigns the current selection (clearing anyone else from that squad). F1–F4 selects the squad, and a quick double press also moves the camera to them.
Standing rules (📜 Rules)
The Rules panel (the 📜 Rules button) shows each rule as a card, grouped by topic, with its current state, what it does in numbers, and the faces of the people it affects. A change counts at once.
- 🌙 Night & watch → Night watch (click 0 to 5): at 19:00 the best shooters who aren't guards take a night watch until the camp has that many guards. At 06:00 they go back to their old jobs. The card shows today's Guards (with their Shooting skill) and who is next up to be pulled in tonight.
- Curfew is a law, not a rule. Its card shows whether it is in force and opens the Laws panel.
- 🛠️ Work → Corpse duty (a switch, on by default): when 8 or more bodies rot near camp and nobody is an Undertaker, the lowest-morale person on Rest, Scavenger or Farmer duty becomes one. The card shows the stench now, who is on duty and who would be picked.
- Dropped bags: how many bags lie in the world, and your Haulers.
- ⚔️ Fighting rules: four columns (Fire at will, Hold fire, Melee only, Avoid contact) with everyone's face under the rule they follow. Click a face to open that person and change it.
Your party: who travels with you
Before you leave camp, decide exactly who comes. There are three ways, and they all do the same thing:
- Press U (or the 🎒 Party button). Every person has a card with their portrait, job and health. Click Stays to take them along (it turns into ✓ With me); click again to send them home. Everyone stays empties the party.
- Right-click a person (hold, or Alt+right-click) → More → Come with me or Stay at camp. With people selected, doing it on yourself does it for all of them.
- In a person's details: 🛡️ Come with me (party) / 🏠 Stay at camp.
Joining sets their job to Escort (Follow) and remembers the old one. Sending them home gives it back, 2nd job included. Someone who lost a leg can't join. People on a follow or bodyguard-me order also count as your party. Party members have a 🎒 chip in the roster. The same panel shows who runs the camp while you're away and how many walkie-talkies you have.
Scavengers search on the way. Party members who are Scavengers (or were before they joined, or scavenge as their 2nd job), or who have Scavenging 4 or more (🔍 on their card), search explored crates, wrecks with loot and bodies within 12 m of you as you travel. They never go more than 15 m from you, never while fighting or with the dead within 10 m (a dozing one only counts right next to them), and give up on anything they can't reach. Then they catch up. Finds go into their bag and haul, as when scavenging, and are dropped off at storage. With full hands they just follow.
Haulers and dropped bags
When someone dies, their equipment, bag, carried resources and rounds (of their gun's calibre) drop as a bag where they fell. A Hauler fetches the nearest bag in explored ground and brings it to storage.
Fog of war
Fog, sight and hearing
You only see what your people see. Everything else is black, or grey where you have been before. Hills, trees, rocks, walls and buildings block the view, and height lets you see over them.
Sight
- Range by day: 25 m + 0.9 m per Scouting level. At night (darkness above 60%): 11 m, or 17 m for a Night Owl, plus the same Scouting bonus. Sharp Eyes adds 30%. Standing on a tower or platform adds 45%. Standing high up adds more: above 14 m, up to 2.3× (see Mountains). In a meadow people see 12% farther, and inside old-growth forest 10% less. Fog cuts sight by up to 45% and rain by up to 15%. The Sharpshooter and Eagle Eye specialisations add 25% and 35%.
- Workers glance around in a wide cone (about 155°) that sweeps with their head. People on a post see all around. You see in a narrower cone (about 115°) toward the cursor.
- Everyone also notices what is right next to them, all around: 5 m for you, 5.5 m for others, 7 m from a post.
- At night your flashlight stretches your view to at least 24 m. Lit places reveal their surroundings at night: a Floodlight 22 m all around, a Campfire 9 m, a Spotlight a 36 m beam sweeping outward, a burning road flare 12 m, vehicle headlights 30 m ahead.
- A place counts as seen if the top of a body standing there (1.1 m) rises above everything between it and the eye. That's why a guard in a tower sees the whole approach.
Hearing
- Hearing range is 11 m + 0.8 m per Scouting level. Keen Ears adds 60% and the Tracker specialisation 50%.
- Zombies you can't see groan now and then: every 7 to 15 seconds when wandering, and every 3 to 11 seconds when hunting (heard 30% further away). Whoever hears it marks a ripple on the ground and on the minimap. The ripple is off by 2 m plus 12% of the distance. The alert log says who heard it and from which direction, at most once every 25 seconds per person and direction.
- A zombie out of sight that starts hunting someone is reported as "something coming".
- Gunshots out of sight are reported ("Gunshots to the …"), at most every 15 seconds.
Noise
Every noise has a radius. Zombies inside it that aren't already chasing someone go to look. By day, dozing zombies react only within 45% of the radius and other stragglers within 70%. At night, and for hordes, the full radius counts.
How far it carries (metres)
| Source | Radius |
|---|---|
| Raid on the camp (firefight) | 55 |
| Hunting rifle shot | 55 |
| Shotgun shot | 50 |
| Shooting a raider scout | 40 |
| Pistol shot | 38 |
| Driving a vehicle (every half second) / engine idling | 35 / 14 |
| Warning shot at the cult preacher | 35 |
| A feast in camp · a Volatile zombie bursting · broadcasting from the radio tower | 30 |
| Molotov landing | 25 |
| Lures | 18 to 60 (see lures) |
| Repairing a vehicle | 18 |
| Hammering (building, repairing) · breaking rock | 16 |
| Chopping a tree | 14 |
| A zombie bashing a wall · smoke from a burning burn pit | 10 |
| Running footsteps | 7 |
| Melee hits: bat, fire axe, crowbar / machete / knife, spear / fists | 6 / 4 / 3 / 5 |
| Crossbow shot | 4 |
| Walking footsteps | 3 |
Multipliers on a person's noise: sneaking ×0.25, sprinting ×1.6, Quiet trait ×0.5, Silent Shooter ×0.5, a cold or flu (coughing) ×1.25. Quiet halves footsteps and work noise but not gunshots. Weather: rain shrinks every noise radius by up to 25%, and a storm by another 20%.
every shot is a decision
What you know (the maps show knowledge, not the world)
Nobody out there is marked on the minimap or the big map until you know about them, and you only know what you or your people have really found out. Each marker says how you know and how old the news is.
| How | What it marks |
|---|---|
| 👁️ Seen | Someone saw them. A person seen right now is a live blue dot with a name tag; seen earlier, a marker where they were, with a dashed circle that grows by 4 m for every hour since (up to 90 m): they may have moved on. Faction camps are pinned once you have explored their home. |
| 👂 Heard | A fight out of sight (55 m) or a cart's creaking wheels (30 m): a 14 m circle around roughly where it came from. |
| 📻 Radio | A voice gives a rough area, never a pin: a circle of 55 m (40 m for a distress call, 70 m for a herd) with the true spot somewhere inside it, not at its centre. |
| 🗣️ Told | Someone told you: a faction (their camp as a 70 m area until you find it), a thief's niece in the woods. |
| 📋 Reported | A team came back and described it: an expedition's destination and route. |
- No news until you meet them. What one of your people sees counts only while they are in touch with you: within 45 m of you, or at camp while you are home (or while a walkie-talkie links you). Someone out alone who spots a stranger tells you when they're back; while you are away from camp, what the camp sees reaches you when you return (it also goes into the return brief).
- A flare marks a 40 m area, not the person who fired it. People are forgotten after 5 days, rumours after 4, a heard sound or a herd sooner. Places stay.
- The 3D view shows people out there only where your people can see them, like the dead.
- A migrating herd shows on the maps only as you know it: its last known spot, heading and age (see Herds), never with the way it will go; the radio can tell you roughly where one is.
The big map (🗺️, Shift+M)
A full-screen map of everything you know: the terrain and the ground you've explored (the rest stays dark), roads, rivers and lakes, your camp and the ruined sites you've seen, places (a gold ? until explored, then an icon and a name), and:
- Your trail (gold): where you have walked, one line per day, older days fainter. It is compressed as you go and kept in the save.
- Team trails (dashed, one colour each): where your people went without you, drawn only once they are back and have reported (or you met them out there). A Woodcutter who wandered 150 m out leaves a trail named after them and the day. Expeditions report their route and destination.
- What you know: people, traders, raiders, faction camps, rumours, with their age (hover a marker for who saw it and when).
- Your pins: click anywhere to drop a pin; pick ⚠️ Danger, 🎒 Loot, 🤝 Meeting point or 📝 Note, type a line (Enter saves), click a pin to edit it or 🗑 Remove it. Pins show on the minimap too and are saved.
Drag to pan, mouse wheel to zoom (buttons: ⌖ You, ⛺ Camp, ⤢ All, +, -). Click a legend row to hide or show that layer. Esc closes the pin editor, then the map. The game keeps running while the map is open.
Visitors at the gate
Everyone who comes to the camp is a real person who walks there. They set out 85 to 140 m away, out of sight (from the side their camp lies on, for factions), walk to a spot 4 m outside your home gate, and only then does their card open. You may spot them on the way (an alert says from where); talk to them on the road (E) and the visit happens right there.
| Who | Who walks up | Waits |
|---|---|---|
| A stranger (or someone who heard your radio mast) | One person | 12 h, sleeping by the gate at night |
| The old pedlar / a faction's traders | A trader with a pack mule / two traders with a mule and a cart | 3 h |
| Tribute collectors | Three armed raiders | 3 h |
| A raider scout | One man with a rifle on a rise 22–36 m outside the walls: his card comes when someone at camp actually sees him | 3 h, then he slips away (unseen, he still reports back) |
| A preacher, the commune's girl, envoys | One or two people | 4 h |
| A raid | 2 to 6 raiders walk up from their side; the fight is resolved when the first is within 14 m of the gate (at most an hour after 23:00), then they run | — |
| Help from a friendly camp, a gift collected | The person they send, who joins on arrival; a runner with the rounds, food or prayers; a runner who takes your gift home | 2–6 h |
| A note for someone, the man it's from | A kid who walks the note to the gate; the rival himself with two of his people | — |
| A parent with a sick child, an exile coming back | The people themselves | 8 h |
- Someone of yours must be at camp to open the gate. If nobody is home, visitors knock, wait, and leave.
- While you're away without a radio link, your deputy meets them. A stranger always waits for you (with the ⏳ mark); if you don't come back in time they give up and walk off.
- Everyone leaves on foot. Traders and envoys go back the way they came and are gone once out of sight. A stranger you turned away, an exile and someone who walked out of the group stay out in the world: they find a shelter and you can meet them again (the map remembers their name). People who left to join another group walk toward it and are gone.
People out there
- Survivors you haven't met live small lives: they have a shelter (a house in town, a farm, a cabin, a wreck, a campfire in the wilds), scavenge crates, wrecks, berries and firewood within about 40 m, look around, rest out of sight, sleep in their shelter from 21:00 to 06:00, and every one to three days move to another shelter up to 280 m away (by day). When one of the dead comes within 13 m, or a herd passes near, they slip back into hiding. Someone who fired a flare waits near it for 18 hours.
- Far from you, your people and the camp (over 110 m), they aren't simulated step by step: they walk a straight leg at 1.3 m/s in time, so you find them where the world says they are.
Idle hands in camp
People with nothing to do (the Idle job, or a job with nothing to do) don't stand by the fire: inside the walls they tend the fire, walk to a wall or the gate and look out, draw water at a well, rain collector or intake and carry it to the kitchen, sit together around the fire, or go over and talk to someone who is also idle. Each thing lasts 15 to 35 seconds. People who are sick, grieving or worn out just rest.
The dead
The dead
No special infected: just people who died, some big, some fresh, some missing their legs. They get tougher as the days pass.
Types
| Type | Health | Speed (m/s) | Damage | Reach (m) | Wind-up (s) | Cooldown (s) |
|---|---|---|---|---|---|---|
| Rotting Shambler (shambler) | 30 | 1.55 | 7 | 1.05 | 0.45 | 1.1 |
| Feral Runner (runner) | 20 | 4.4 | 5 | 0.95 | 0.28 | 0.8 |
| Bloated Corpse (bloater) | 60 | 1 | 9 | 1.15 | 0.6 | 1.3 |
| Big One (brute) | 110 | 1.8 | 14 | 1.25 | 0.6 | 1.5 |
| Legless Crawler (crawler) | 20 | 1.2 | 6 | 0.9 | 0.4 | 1.2 |
| Fresh Turned (spitter) | 26 | 3.2 | 7 | 1 | 0.35 | 0.9 |
- New dead are mostly Shamblers. Runners become more common every day. Bloaters grow common from Day 2 and Big Ones from Day 3. (Weights: shambler 60, runner 12 + 2 × day, crawler 12, bloater 6 + day from Day 2, brute 3 + day from Day 3, Fresh Turned 3 + day/2.) A turned survivor rises as a Fresh Turned.
- Levels. A zombie's level is the day it appeared: each level above 1 adds 18% health and 10% damage.
- Rare dead. About 10% of wanderers (12% in hordes) are tougher "magic" zombies with 1.8× health and one modifier. About 4% (5% in hordes) are named rares with 3× health, 1.5× damage, a larger body and two modifiers. Modifiers: Hasted (1.4× speed), Armoured (takes 60% damage), Frenzied (1.5× damage, attacks 40% faster), Regenerating (heals 2% of its health per second), Volatile (bursts when killed, hurting everyone and every building within 3.3 m), Virulent (its bites are twice as likely).
- Big Ones barely flinch from hits. Melee hits interrupt a zombie's wind-up.
- The dead can't reach anyone standing on a tower or platform.
- They can't swim: deep river water sweeps them downstream to a ford or off the map, and lakes slow them to a crawl until they freeze. Marsh, shallows and snow slow them too (see Rivers).
- The countryside refills: while there are fewer than 90 + 6 × day hostile dead, new wanderers appear out of sight, away from your people. The world holds at most 520 bodies (living and dead). When it's full, the oldest corpse nobody is dragging is recycled.
How they notice you
- Drowsiness. More than half of the dead doze on their feet (55% when they spawn). By day a dozer only sees 3.5 m. Other daytime wanderers see 6 m. Once active (at night, in a horde or siege, or investigating something) they see 13 m by day and 10 m at night, 30% more when besieging. Aggression and weather multiply all of this.
- They need a clear line of sight. Walls, hills and trees hide you. People up on a post only draw attention from close by.
- Sneaking people are noticed at half the range.
- Smell. A zombie downwind of someone can smell them from
10 + 8 × windm. Rain halves that. A bleeding (unbandaged) person smells 1.8× as far, and someone dragging a corpse 1.3×. People up on posts can't be smelled. The wind arrow on the top bar shows where the wind blows. - Getting hurt wakes a zombie up and sends it looking for 15 seconds. The dead move 15% faster at night.
- A zombie that loses its target searches the last known spot for 12 seconds. Hordes and sieges keep going as long as they have "interest" (90 seconds at the start). Interest drains while they can't see or hear anyone. When it runs out they disperse: they walk 35 to 50 m away from the camp and wander again.
- A zombie that bumps into a wall or gate while hunting, besieging or investigating bashes it for 1.2× its damage per hit, as long as it still has interest.
- Spike traps, barbed wire and trenches deal 10 damage per second to anything standing in them and halve its speed. The trap loses 2 health per second while in use.
Hordes and lures
Nightly hordes are described in The first two days. With an Alarm Bell, a spawning horde also rings the alarm: everyone outside the walls who isn't a guard or escort comes inside, for at least 60 seconds.
Lures are thrown with V (up to 20 m) and switched with N. They make noise in pulses. A herd within the lure's radius + 60 m turns toward it for the lure's life + 20 seconds. You start with one alarm clock and one pack of firecrackers.
| Lure | Lasts (s) | Pulse every (s) | Pull radius (m) | Craft cost |
|---|---|---|---|---|
| ⏰ Wind-up Alarm Clock | 40 | 2 | 28 | 3 scrap · work 6 |
| 🧨 Firecrackers | 8 | 0.6 | 48 | 1 scrap, 1 cloth · work 6 |
| 🎇 Road Flare | 60 | 3 | 18 (40 at night) | 2 scrap, 1 fuel · work 6 |
| 📻 Battery Radio | 180 | 3 | 26 | 6 scrap · work 6 |
| 🚨 Car Alarm Rig | 30 | 1.5 | 60 | 5 scrap · work 6 |
Herds: what you know, the herd policy, turning them aside
Migrating herds. From Day 4 or 5 a herd of 110 to 200 + 4 × day dead crosses the valley now and then, passing 10 to 65 m clear of your walls at about 30 m an hour (1 m every real second at 1×) and leaving on the far side. The dead in it slide along a wall they bump into rather than beat on it (unless they have seen someone). The next one comes 2 to 4 days after the last started.
You only know what someone found out. Nobody hands you a timetable. A herd is known only when:
- someone sees it (in the fog of war: their eyes, a tower, the ground in the way): its spot, its size (±15%) and which way it walks;
- someone hears it: a big herd's moaning carries about 115 m (15% more at night; rain, wind and chopping or building drown it; Keen Ears +30%): a direction and a rough distance, a 35 m circle, no heading. Two hearings half an hour apart give a heading;
- a scout or a mission team reports it (see Scouts);
- a voice on the radio mentions it: "somewhere north of you, heading south-east" — a 90 m area and a rough heading, never an exact spot or a time.
Who knows it. Knowledge is held by whoever has it. A camp knows what reached that camp: people who saw or heard it while there, a walkie-talkie call from someone out there in range, someone walking back in with the news. You know what reached you: what you or someone with you saw or heard, the radio, and a camp's knowledge while you're at that camp or in radio contact with it. Nothing travels any other way: away from camp and out of touch, you hear of a herd only on the way back.
- The top bar shows the herd as you know it: 🧟 Herd ~150 · ~40 m N → SE · 👁️ just now while someone is looking at it, then 🧟 Last seen: herd ~150 · 170 m NW of camp → SE · 👂 50 min ago (frozen where it was last seen; it does not follow the herd). With the pass the camp expects: · passes ~14:00.
- The minimap and the big map draw its last known spot (red circle), its heading (arrow) and, dashed, where we expect it over the next three hours, with a circle of doubt that grows with age. That's an estimate: a lure or a fence may have turned it. Someone who looks at the expected spot and finds nothing reports it: "lost track of it".
- A herd nobody knows about gets no reaction at all. That's what scouts are for.
The herd policy. A camp that knows of a herd works out when it passes (its closest point, from the last sighting, the heading and ~31 m an hour) and follows the policy by itself — its deputy calls it if you're away, and you learn of it on the radio or when you're back:
- everyone inside by an hour before its edge comes within
R + 70m of the centre (earlier the less sure we are: +1 h per 70 m of doubt, up to +1 h for an old sighting); the task reads "Herd due ~14:00: inside and quiet"; - quiet: everyone at camp holds fire (guards too) unless the night's dead are at the walls; lights out after dark (the Blackout rule, put back afterwards);
- until it has gone by (as far as anyone can tell), then "All clear". A herd close by whose way nobody knows keeps everyone in until someone finds out (at most 1.5 h per sighting).
- Guards, patrols, the night watch, your party, people on a mission, a supply run, a scout round or a herd job carry on. Scout rounds don't start while it passes; scouts with a walkie in range are called back.
- The policy can be switched off per camp in the 🎯 Goals panel's Herd watch.
Turning a herd aside. When a camp expects a herd, the Goals panel's 🧟 Herd watch shows when and where it passes and offers what you can do about it (each one click; orders need you there or a radio):
- ⏰ A timed decoy (an alarm clock, a battery radio or a car alarm rig from the stash): someone takes it out to a spot off its way, on the far side from the camp, and sets it to go off when the herd is near. The herd turns to it; pulled 45 m or more off its way, it wanders on from there toward where it was going, instead of coming back past the camp. You can also plant one yourself: right-click the ground next to you (or with someone selected, send them) → "Plant … here, set for +30 min / 1 h / 2 h".
- 🔥 Burn a wreck you know of near that spot (2 fuel or a molotov): fire and smoke draw it for about 10 minutes, 48 m by day, 72 m at night.
- 🏃 A runner leads it off (risky): an armed, fit person walks out to meet it, shouts, keeps 35–60 m ahead of its edge and walks it off 150 m, then breaks away and comes home. Seen up close, some of it chases them. Nobody leads a herd home: within
R + 60m of the camp they stop. - 🚧 A funnel fence: a slanted line of stakes and wire (5 wood a section) across its way, well out from the walls. Builders go out and put it up (it becomes the top goal); a herd that runs into it slides along it to its far end. Only worth it with an hour and a half or more in hand.
- 🏠 Everyone inside: the herd policy itself.
A herd is only simulated as individual zombies within 70 m of your people or camp (up to 170 at once), and dissolves back into a blob beyond 100 m. Members that start chasing someone break away from it. You can't fight a herd head-on.
Looting the dead
Many of the dead still wear what they died in, and you can see it on them: a backpack (18%), a helmet (6%) or cap (15%), a vest (8%), a pouch (16%), or a weapon (10%).
- Searching a corpse (E for 2 seconds, or order someone: 2.5 seconds) gives what it visibly carries, plus pocket change: scrap (30%), food (15%), a bandage or knife (8%). A backpack holds some food, cloth and water, maybe ammo or medicine, and 45% of the time the backpack itself. A pouch holds 3 to 10 ammo or 1 to 2 medicine. A vest is a riot vest (40%) or a leather jacket. A helmet is a Combat Helmet. A cap is 1 cloth. A weapon is the knife, crowbar, bat, machete, fire axe, pistol, shotgun or rifle you saw.
- Pickpocketing lifts one visible item off a living zombie: E next to a dozing one (1.2 seconds), or the order menu on any one that carries gear. The chance is 35% if it's unaware (5% if not), +5% per Scavenging level, +20% while sneaking, +10% for Quiet. If it fails, the zombie wakes and attacks. It takes the pouch first, then the weapon, the pack, the vest.
Corpses, stench and dragging
- Corpses stay for about 30 game hours. Dumped bodies rot six times faster, and bodies on the burn pit disappear almost at once.
- Stench is the number of unburnt corpses within 26 m of the camp centre, counted every hour. Each one lowers everyone's morale target by 1.2. Above 6 you get a warning every three hours. Stench also draws wanderers within 60 m of the camp, and from Day 3 adds up to 4 to the evening horde.
- Undertakers collect bodies within 40 m of the camp and drag them to the Burn Pit, or 48 m out from the camp centre if there isn't one. You can also order anyone to Drag it away.
The camp
The camp
Claiming, outposts and territory
- Every map has a main camp site ("The Old Camp") and 2 to 4 more abandoned sites (up to 6 on a Huge map) with names like Pine Hollow or Scout Camp Echo. Sites are round or rectangular. The Old Camp is roomy: 14 to 20 m in radius, or 26 to 40 m across (a little bigger on maps of 640 m and up). The others vary: about a quarter are tiny (6 to 9 m), most are ordinary camps (10 to 17 m), and on maps of 512 m and up one or two may be a large walled compound (18 to 26 m, names like Fort Kessler or The Stockade) with more towers and nests.
- The first site you claim becomes home (the main camp). You can claim the others later (E at the site) as outposts: same rules, their ruins become yours, and their perimeter is planned. Only the home perimeter counts for the Day 2 objective. Every camp keeps its own stores and its own people: see Several camps.
- Each perimeter's gate is where the old gate was: facing the road you arrive by at the Old Camp, and the track leading in at every other site.
- Territory is the claimed site plus a 4 m margin, drawn as a warm tint with a bright border. Every structure you finish claims the ground around it (7 m, or 6 m for walls and gates), so building outward grows the camp. You can only plan within 9 m of your territory.
- Storage, per camp, holds 120 units plus 250 per Storage Shed at that camp. Ammunition of any calibre doesn't count. When storage is full, nothing is thrown away: what doesn't fit goes down in a bag by the store (you get one warning a minute, saying what was left and whether to build a first or another Storage Shed; the Goals planner proposes a shed when the stores are 85% full). A Hauler brings the bag in once there's room. Before you claim a camp there is no limit.
- Beds: a Tent sleeps 2 and a Bunkhouse 6, for the people of the camp it stands in. You (the leader) don't need a bed. Anyone sleeping on the ground loses 6 morale at midnight and recovers from fatigue more slowly.
Several camps: their own stores, people and supply runs
Each camp you hold is a camp of its own. Nothing moves between them by magic: goods go from one to another on someone's back.
- Its own stores. Every camp has its own stock (wood, food, water, rounds…), its own stash of items and its own workshop queue. Wells, rain collectors, pumps and intakes fill the camp they stand in. A builder pays for a blueprint from the stock of the camp the blueprint is in, never from another camp's. Fresh food keeps its own freshness at each camp, and raw river water stays raw.
- The top bar shows the stock of one camp at a time, with its name: 🏕️ The Old Camp ▾. Walking into a camp shows that camp. Click the name to switch, see every camp's people and stores at a glance, and open 📦 Supply runs or 🏕️ Camps. The stash (I), the workshop's crafting orders and what a decision costs are those of the camp shown (a decision about someone is paid from the camp they live at).
- People live at a camp. Each person's details have a 🏕️ Lives at choice (with two camps or more). They work around that camp, deliver to its storage, eat and drink from its stores, sleep in its beds, stand its night watch and are treated by its medic. Newcomers join the camp you are at (someone taken in at a gate, that gate's camp). Your party counts as wherever you are. Gear is handed out from the stash of the camp the person is at: equipping someone who lives at another camp from this camp's stash isn't possible; send it with a supply run.
- Midnight: each camp feeds its own people from its own food. An outpost without food goes hungry even if the main camp is full.
- Orders need you there, or a radio. You run a camp in person. From elsewhere, with walkie-talkies in touch with it, its deputy passes your orders on (a 📻 message says who); out of touch, nothing you decide reaches it until you go there. That covers planning buildings there, its workshop orders, supply runs from it, moving or equipping its people, naming its deputy and abandoning it. Bandages and gear come out of the stash of the camp the person is at: yours only help when you are at a camp.
- No news from afar. While you are away from a camp and out of radio contact you don't hear what happens there: no alerts, no notices, no decisions in the tray. The top bar shows its stock as you left it (📵 as of Day 2 14:00). It is all in its return brief when you come back.
- Only one of each "one per camp" building (a workshop, a kitchen, a radio station…) at each camp.
Supply runs (📦)
- Open it from the camp name in the top bar (📦 Supply runs…) or the 📦 Supply button. Pick from and to, type the amounts (or press +5), and click the faces of who carries. Each person carries 12 plus what their pack slot holds (a Backpack or Rucksack helps); an item takes 3. The load line shows what you've asked for against the room.
- Start the run: the carriers walk to the storage, load up with what is really there, and walk the road as a small caravan in single file, each with a pack on their back and a 📦 on the minimap. At the other end they unload into that camp's stores; what doesn't fit (storage full) comes back with them. Then they walk home and go back to their old job.
- The road is dangerous. Carriers fight or run like anyone else. Someone who falls drops the load where they fall, a bag on the ground (marked on the minimap): a Hauler will fetch it, or stand over it and press E (Pick up the bag) and hand it in at a storage.
- If they can't find a way (a river, a wall), they try going round a few times, then turn back. If the camp they were heading to falls, they turn back with everything. Call back turns a run around.
- 🔁 Every morning at 07:00 makes it a standing run: the same people set out again each morning with what is there (up to the same amounts), if they are free. Stop it in the panel.
- Nobody carries while bitten, on the night watch, in your party, with one leg, exhausted, or already on a run.
Losing a camp
- An outpost falls when the dead hold it: three or more of them inside its walls with nobody of yours inside for an hour. You are warned partway. The main camp can't fall this way.
- You can also abandon an outpost (🏕️ Camps, click Abandon twice). Its people first pack what they can carry.
- Either way its people move to the nearest camp you still hold, runs to it turn back, standing runs stop, and what was left in its stores lies where it stood as one bag by the storage: fetch it later. You can claim the site again.
Ruined camps
- Every camp site was built up by someone before you and then partly torn down. What is left is the same for the same seed.
- The palisade survives in stretches, with the breaches in clumps. At the Old Camp 25% to 50% of it is still there in some state (about 38% on average). Elsewhere it's anything from 15% to 60%. A few stretches were patched with planks and scrap into Reinforced Wall barricades.
- Each surviving piece is in one of four states. Intact (rare, about 1 in 10). Damaged: standing at 20% to 80% health (about half of them). Barely standing: 5% to 20% health; it counts as closed, but the next horde walks through it. Unfinished frame: a paid-for blueprint 10% to 70% built. Builders finish frames for free.
- The gate still hangs at most sites (damaged or barely), is an unfinished frame at some, and is gone at about a third. A gone gate becomes a gate blueprint when you claim the site. The gate and the way from it to the fire are always kept clear, so you can walk in.
- Defences: watchtowers in the corners or along the wall (1 to 3 at the Old Camp, 2 to 4 at a compound, often none at a small site), firing platforms behind standing stretches, and sandbag nests covering the gate. They work like new ones: man them, repair them, upgrade them. A tower that still stands counts for "Build (or repair) a Watchtower and post a Guard in it".
- Buildings survived at about 1 other site in 4 (tiny sites almost never, compounds about half the time), never more than two per site: a storage shed, a tent, a workshop, a kitchen, a well or (at compounds) a bunkhouse, usually damaged. The Old Camp almost always has one (about 85% of maps), most often the storage shed. They work as soon as the site is yours.
- Charred ground, fallen logs, stumps of burnt posts, plank piles and a collapsed tent lie around, and 2 or 3 crates wait to be searched (0 to 2 at smaller sites). Debris is only for looks; it disappears under anything you build on it.
- The Day 2 goal counts every perimeter section of home, standing or not: "12/53 sections standing · 4 barely holding". Builders take frames and gaps first, then repair damaged pieces (1 wood per 60 health) once nothing is left to build.
- Nothing at a site you haven't claimed is yours: it doesn't count for storage, beds, raids or the one-per-camp limit, and builders leave it alone. Unfinished frames show their blueprint outline only once the site is claimed. Claiming an outpost keeps all its remains, just like home.
Building
- You can build, repair and work stations yourself with E: see Working with your own hands. At night the camp always keeps a guard and (from 5 people) a patrol: see Day jobs.
- Planning a blueprint is free. A Builder pays for it from storage when starting work. Builders take perimeter blueprints first (as if they were 40 m closer), then the nearest affordable one. If nothing is buildable they repair damaged structures, at 1 wood per 60 health. Repairs start only with at least 1 wood in storage, and the last scraps of wood still patch what they can./li>
- Click a building to see its state. Remove blueprint refunds what was already paid. Demolish refunds 50% of the cost. Perimeter pieces can't be demolished.
- When a perimeter piece is destroyed, a replacement blueprint appears in its place, costing materials again.
- Upgrades in place: once invented, right-click a wall, gate or tower and choose "Upgrade to …", or use Upgrade all in the Tech panel. The old structure keeps standing until builders finish the new one.
- Alarm Bell: when a visible zombie gets within about 22 m of your territory, the alarm sounds for 25 seconds (and for at least 60 seconds when a nightly horde spawns). Everyone outside the walls who isn't a guard or escort drops their work and heads to the fire. Tripwire cans ring the bell too. "All clear" only sounds when none of the dead are awake within about 60 m of the walls and no horde is within 150 m; until then the alarm holds.
- Breach: with or without a bell, the moment any of the dead get inside the walls of a claimed camp (the dead pressing on the outside of a wall don't count), everyone inside wakes up. Rest, grief and sickness are put aside. Armed people go for the nearest intruder (they look for them out to 16 m instead of 7). The unarmed and the cowardly gather at the fire. People in quarantine fight back or run if something reaches them. The alert repeats every 45 seconds while the breach lasts. Unarmed people and cowards behind the walls don't panic at the dead outside them.
- Defending the walls: when the dead bash a wall or gate, your people answer before it breaks. Guards come from up to 70 m. By day anyone else armed comes from up to 45 m; at night only the watch answers. If a wall is in real trouble (three or more of the dead on it, or half broken), the watch shouts for help and armed people sleeping nearby get up. Everyone else sleeps on until the dead actually break in. With nobody on watch, nobody shouts. Gun users shoot from a few metres inside; spear-length weapons jab over the wall. People with short weapons or none stay back (they can't reach over), and nobody goes out through the gate to do it.
- Gates open for your people within 3.2 m and stay shut to the dead. Nothing can bite or hit through a standing gate or wall. A zombie that reaches for someone on the other side hits the structure instead, so keep gates repaired. Your people can still jab through with spears and shoot over.
- Nothing can be built on water, cliffs or bridges. A river or lake next to camp is a wall you didn't have to build.
- Watchtowers raise the guard 4.6 m (Stone Watchtower 6.2 m, Firing Platform 1.6 m). From a post, guns reach 25% further and are more accurate. Sandbag nests absorb 40% of the damage the guard takes.
Defense
| Building | Cost | Work | HP | Needs | Upgrades to | Notes | What it does |
|---|---|---|---|---|---|---|---|
| 🪵 Wooden Palisade | 8 wood | 6 | 260 | — | Reinforced Wall | wall | Sharpened logs. Drag to place a line. |
| 🧱 Reinforced Wall | 6 planks, 4 scrap | 9 | 600 | Reinforcement | Stone Wall | wall | Planks + scrap plating. Much sturdier. |
| 🏰 Stone Wall | 14 stone, 1 metal | 14 | 1300 | Masonry | — | wall | The strongest wall. Slow to build. |
| 🚪 Gate | 20 wood | 12 | 500 | — | Reinforced Gate | survivors pass | Survivors pass through, zombies do not. |
| 🛡️ Reinforced Gate | 16 planks, 8 metal | 18 | 1400 | Gate Upgrade | — | survivors pass | Iron-banded gate. Nearly three times as tough. |
| 🗼 Watchtower | 30 wood, 10 stone | 20 | 400 | — | Stone Watchtower | guard post 4.6 m up | A guard up here sees much farther (height!) and shoots better. |
| 🏯 Stone Watchtower | 40 stone, 10 metal | 34 | 1300 | Stone Towers | — | guard post 6.2 m up | Taller and nearly unbreakable. Guards see even farther. |
| 🪜 Firing Platform | 10 planks | 8 | 300 | Firing Platforms | — | guard post 1.6 m up | A walkway behind the wall: a guard stands high enough to fire over it. |
| 🧱 Sandbag Nest | 4 cloth, 6 stone | 6 | 350 | Sandbags | — | cover 40% · survivors pass | Guard post with cover: the guard takes 40% less damage. |
| 📌 Spike Trap | 6 wood | 4 | 120 | Traps | — | trap · zombies walk over | Damages and slows zombies walking over it. |
| ➰ Barbed Wire | 6 scrap | 4 | 160 | Barbed Wire | — | trap · zombies walk over | Tangles and cuts anything that walks through it. |
| 🕳️ Trench | 3 wood | 10 | 400 | Trenches | — | trap · zombies walk over | A spiked ditch that slows the dead to a crawl. |
| 🥫 Tripwire Cans | 3 scrap | 2 | 40 | Tripwire Alarms | — | zombies walk over | Rattling cans warn the camp when something walks through (rings the bell). |
| 🔔 Alarm Bell | 10 scrap, 4 wood | 6 | 100 | — | — | one only | When zombies near the camp are seen, workers retreat inside. |
| 💡 Floodlight | 18 scrap | 8 | 100 | Generator | — | floodlight | Lights up the night so guards can see. |
| 🔦 Spotlight | 6 metal, 6 scrap | 8 | 120 | Spotlights | — | spotlight | A long beam that reveals the dark far beyond the walls. |
Living
| Building | Cost | Work | HP | Needs | Upgrades to | Notes | What it does |
|---|---|---|---|---|---|---|---|
| 📦 Storage Shed | 35 wood | 16 | 300 | — | — | — | +250 storage capacity. |
| ⛺ Tent | 6 cloth, 4 wood | 5 | 80 | — | — | — | Beds for 2. Sleeping outside hurts morale. |
| 🏠 Bunkhouse | 45 wood, 10 stone, 8 cloth | 28 | 500 | Carpentry | — | — | Beds for 6 and a morale boost. |
| 🔥 Campfire | 6 wood, 4 stone | 3 | 60 | — | — | zombies walk over | Light, warmth and morale. |
| ⚱️ Burn Pit | 12 stone | 6 | 200 | — | — | one only · zombies walk over | Undertakers burn corpses here — stench vanishes fast. |
Production
| Building | Cost | Work | HP | Needs | Upgrades to | Notes | What it does |
|---|---|---|---|---|---|---|---|
| 🍲 Kitchen | 25 wood, 15 stone | 16 | 250 | — | — | one only · station | Cooks turn food into meals (worth double), dry and salt fresh food so it keeps, and lift morale. |
| 🛠️ Workshop | 35 wood, 15 scrap | 22 | 300 | — | — | one only | Research inventions and craft gear. |
| 🏥 Infirmary | 25 wood, 12 cloth | 18 | 250 | — | — | one only | Medics heal 3x faster here. |
| 🌱 Farm Plot | 10 wood | 8 | 80 | Farming | — | zombies walk over | Farmers grow food here. |
| 🪚 Sawmill | 30 wood, 8 scrap | 18 | 300 | Sawmill | — | station | Artisans saw wood into planks (2 wood → 1 plank). |
| ⚒️ Forge | 25 stone, 12 scrap | 22 | 450 | Forge | — | station | Artisans smelt scrap into metal (2 scrap + wood or fuel → 1 metal). |
| 🍖 Smokehouse | 12 planks, 10 stone | 16 | 250 | Smokehouse | — | station | Smokes fresh food so it keeps (fast, burns a little wood) and makes meals (2 food + 1 wood → 2 meals). |
| 🪡 Tailor | 10 planks, 6 cloth | 12 | 200 | Tailoring | — | station | Sews cloth into warm clothing. |
| 🪴 Greenhouse | 20 planks, 6 metal, 8 cloth | 26 | 250 | Greenhouse | — | station | Grows food and herbs in any season (uses water). |
| 🚰 Water Pump | 10 metal, 10 stone | 16 | 300 | Water Pump | — | +4 water/h | Pumps 4 water every hour, no staff needed. |
| 📡 Radio Mast | 35 scrap, 15 wood | 24 | 200 | Radio | — | one only | Broadcasts — new survivors find their way to you. |
| 🪣 Well | 14 stone, 10 wood | 16 | 300 | — | — | — | Draws ~1 water per hour. Water is life. |
| 🛢️ Rain Collector | 6 cloth, 8 wood | 8 | 100 | — | — | — | Tarp + barrels. Fills fast when it rains. |
| 🚰 Water Purifier | 30 scrap, 15 fuel, 6 medicine | 30 | 300 | Outbreak clue (water truth) | — | one only | Sterilises water. Keep it running for 5 days to end the outbreak (water truth). |
| ⏳ Sand Filter | 10 stone, 8 wood, 3 cloth | 10 | 150 | — | — | — | Gravel, sand and charcoal barrels: cleans 6 raw river water per hour, no fuel. |
| 🚿 River Intake | 12 wood, 6 scrap | 10 | 150 | — | — | — | A bucket chain and pipe: +3 raw water per hour if built within 14 m of a river, lake or pond. Boil or filter it. |
"Work" is how much labour a building takes; a Builder does about 0.45 + 0.11 × Building skill per second before bonuses. The Water Purifier only appears in the build menu once the outbreak's water truth is revealed.
Goals & the planner (🎯, Shift+G)
Each camp has its own goals, in order: what you want done there. The group fits itself to them: it moves people to the jobs the goals need, fills idle hands with goal work, and tells you what stands in the way and how to get past it. A claimed camp starts with good defaults: Close the perimeter, Beds for everyone, Keep 2 days of food and water, Clear the bodies, Keep the walls repaired.
| Goal | Met when | What the group does for it |
|---|---|---|
| 🧱 Close the perimeter | every wall section and the gate stand | builders on the gaps, woodcutters for the wood they wait for |
| 🏗️ Build a … | it stands (one-offs are ticked off and move to "Reached") | the blueprint is put down inside the walls for you (towers near the wall); a locked one asks for its invention first |
| 📦 Stock N of something | the stores hold N (kept up) | the job that brings it in (wood → Woodcutter, stone → Quarrier, scrap, cloth, food, medicine, fuel → Scavenger, water → Water Carrier, planks and metal → Artisan); it keeps that much back from lower goals |
| ⛺ Beds for everyone | beds ≥ people (a tent sleeps two) | tents are put down, two at a time, until they would do |
| 🍞 Keep N days of food and water | food ≥ N per person, water ≥ 1.5 N per person (meals count double) | scavengers, water carriers, fishers |
| 🗼 N towers manned at night | N towers built and at least N guards on the night watch | towers are put down by the wall |
| ⚰️ Clear the bodies | no bodies left within the undertakers' reach | undertakers (one per 8 bodies, at most two) |
| 🔧 Keep the walls repaired | nothing below 90% | builders mend (1 wood per 60 hp) |
| 💡 Research … | invented | a crafter at the workshop |
| 🙋 Grow the group to N | N people | (it can only suggest: see the plans) |
Order matters. Builders take the blueprints of the highest goal first, and materials go to the goals in their order: nobody spends the wood a higher goal is waiting for on a lower one (a Stock goal keeps its amount back too), unless the higher goal can't be finished anyway (it is short of something nobody can bring in). Repairs wait the same way. Move goals with ▲ ▼, drop one with ✕, add one on the right (a template, its option buttons, Add or Add at the top).
The planner (at most four moves an hour per camp, by day):
- It works out, for the unmet goals from the top, how many hands each job needs (building hours, materials short, bodies) and gives every goal's work somebody before the first goal gets more. It moves people who aren't pinned from a job no goal needs (the idle first), best skill and the right gear first, and hands them the tool for it from the camp's stash. Nobody is moved again within 3 hours; guards, patrols, medics, cooks, crafters, farmers, scouts and anyone out on something are left alone.
- It gives 2nd jobs (see the jobs board): gatherers help build when building is what the top goal needs; builders chop or quarry what they wait for.
- 📌 Pins. Anyone whose job you set yourself (the Jobs board, the roster) is pinned: the planner leaves them be. Someone you put on Rest rests. Click a face in a goal card to pin or unpin. The deputy's calls while you're away don't pin.
- 🤝 The group organises itself ON/OFF per camp, and Moves people / Only suggests (then the planner's changes are listed with an Apply button). Every change is logged in the panel and in the camp's brief.
Nobody sits idle while goal work exists. Someone whose job has nothing to do (a woodcutter with no trees in reach, a builder waiting for materials, an undertaker with no bodies, someone on Rest who wasn't told to rest) picks up work for the goals in their order, for at least 25 seconds at a time, and the task says so: "Chopping wood (goal: Close the perimeter)". Their 2nd job comes first if it has work. Outdoor goal work stops at dusk.
- Materials to the builders. A hauler with no bags to fetch (and anyone filling in) carries a blueprint's materials from the stores out to it; they are taken from the stores when picked up and handed back if plans change. A builder with the materials at hand works 20% faster.
- Back when rested. The rest after a night watch or a night shift ends as soon as the person is rested (fatigue below 32), not at a fixed hour.
- A short break, not a collapse. Someone who reaches fatigue 82 at work by day sits down where they are for 20 minutes (fatigue −12 an hour) instead of working on to exhaustion (which costs about 10 hours).
Blockers and plans. Each goal card shows what stands in its way (⛔) and what can be done about it, each plan one click:
| Blocker | Example | Plans |
|---|---|---|
| 📏 Out of reach | "Stone: nothing in reach — the nearest known rocks are 140 m south-east" | Send 2 quarriers with an escort (a work party: they walk out, work the spot, carry it home load by load, back before dusk, at most 5 hours) · a scavenging mission to a known spot · trade with a group you know |
| ❔ Nothing known | "Stone: no rocks known anywhere near" | Scout for them (a scout sector or a scouting team) · trade |
| 🔒 An invention | "Needs the invention: Sawmill" | Research it at the workshop (or build a workshop first) |
| 🏗️ A building | "Planks: needs a Sawmill", "Meals need a Kitchen", "No water source" | Add the building as a goal |
| 📦 The stores | "The stores hold only 370 in all" | Add a goal: build a Storage Shed (+250) |
| 🪓 Tools (soft) | "Ana works without an axe (half the pace)" | Craft a Hatchet / Pickaxe at the workshop (or build one) |
| 🙋 Hands | "About 30 h of building for 4 people", "Only 3 people here to share the nights" | Recruit: follow up a rumour, flare or sighting you know of (a mission) · scout for people · a Radio Mast |
| 🚧 Can't reach it | "Builders can't get to the Tent" | Put it somewhere else |
| 📐 No room | "No room inside the walls for a Workshop" | Look for a spot again (or place it yourself) |
| 🧟 A herd due (soft) | "A herd is due ~14:00: everyone in from 13:00 to 15:00" | (the herd policy; see Herds) |
A plan that is a mission goes out at once with a suggested team and supplies; if it can't (nobody fit, not enough food), the mission planner opens with it filled in and says why.
The group proposes. Every hour by day the camp notices needs and someone proposes a goal (💡, a notice and a card on the right with their face): beds when people sleep on the ground, food and water for less than a day and a half, the perimeter with gaps, bodies piling up (8+), the stores 85% full, an infirmary with 2+ people hurt (from Day 3), a workshop once the walls are up (Day 2), an empty tower at night, a search team for a missing scout. ✔ Accept (the proposer is pleased) or ✖ (not again for a day). While you're away and out of touch, the deputy adopts the urgent ones (food and water, beds, bodies, the perimeter) and you read about it in the return brief.
- Goals, like every order, need you at that camp or in radio contact with it. A camp you can't hear from is shown as you last knew it, with nothing clickable.
- A camp that is lost takes its goals with it. A goal whose blueprint was destroyed puts a new one down; one that can't be done says so.
- The top bar's 🎯 tracker shows the top unmet goal, its progress, ⛔ when it's blocked, and how many are met. Click it for the panel.
Production
Production, research and eras
Resources
| Resource | Always shown? |
|---|---|
| 🪵 Wood | yes |
| 🪨 Stone | yes |
| ⚙️ Scrap | yes |
| 🥫 Food | yes |
| 💧 Water | yes |
| 🔸 9 mm rounds | once you have some |
| 🔺 .308 rounds | once you have some |
| 🔴 12-gauge shells | once you have some |
| 🪶 Crossbow bolts | once you have some |
| 💊 Medicine | yes |
| 🧵 Cloth | yes |
| ⛽ Fuel | once you have some |
| 🪚 Planks | once you have some |
| 🔩 Metal | once you have some |
| 🍲 Meals | once you have some |
| 🌿 Herbs | once you have some |
Production chains
| Station | Input | Output | Staffed by |
|---|---|---|---|
| 🪚 Sawmill | 2 🪵 wood | 1 🪚 plank | Artisan |
| ⚒️ Forge | 2 ⚙️ scrap + 🪵 wood or ⛽ fuel | 1 🔩 metal | Artisan |
| 🍲 Kitchen | 1 🥫 food | 1 🍲 meal (worth 2 food) | Cook |
| 🍖 Smokehouse | 2 🥫 food + 1 🪵 wood | 2 🍲 meals | Artisan |
| 🪡 Tailor | 5 🧵 cloth | warm clothing | Artisan |
| 🪴 Greenhouse | 💧 water | 2 🥫 food (+ 🌿 herbs) | Artisan |
| 🚰 Water Pump | — | 4 💧 water / hour | none |
| 🛠️ Workshop | recipes | inventions & gear | Crafter |
- Artisans staff the stations: Sawmill, Forge, Smokehouse, Tailor and Greenhouse. They stay at one station while it has materials, and otherwise move to the least-staffed station that can work. If nothing can work, the roster says why ("Sawmill: needs wood").
- Cooks work the Kitchen. They turn food into meals, lift everyone's morale target by 6, and cut daily food use by 40%.
- Meals are eaten first at midnight: each meal counts as 2 food. If there are enough meals for everyone, each person gains 3 morale.
- The Forge burns 0.5 fuel per metal when you have fuel, otherwise 1 wood.
- The Greenhouse uses 1 water per batch and is much slower without water. It sometimes also yields herbs (25% per batch).
- The Tailor sews a Warm Coat from 5 cloth.
- The Water Pump and Well need no staff (4 and 1 water per hour). The River Intake adds 3 raw water per hour by a shore, and the Sand Filter cleans 6 raw water per hour (see Water and fish).
- Farmers work Farm Plots for food, and each farmer also gathers 0.25 herbs per hour while a farm exists.
Research
Research needs a Workshop and a Crafter. Start an invention in the Tech panel (T). Its cost is paid up front. Switching to another invention refunds the old one's cost but loses its progress. A crafter works through the craft queue first, then research. To queue crafting, open the Tech panel's Crafting orders…: it lists every craftable item (the ones behind an invention unlock with it) and the queue. Crafting needs a Workshop. When both are empty and Reloading Bench is known, they turn 0.5 scrap into 2 ammo at a time.
Scavenger Era
| Invention | Points | Cost | Requires | Unlocks |
|---|---|---|---|---|
| 🪚 Carpentry | 40 | 20 wood | — | Unlocks the Bunkhouse. |
| 🪵 Sawmill | 45 | 20 wood, 5 scrap | — | Unlocks the Sawmill: wood → planks. |
| 🧱 Reinforcement | 50 | 10 scrap | Sawmill | Unlocks Reinforced Walls (planks + scrap) and wall upgrades. |
| 📌 Traps | 40 | 10 wood | — | Unlocks Spike Traps. |
| ➰ Barbed Wire | 45 | 10 scrap | Traps | Unlocks Barbed Wire. |
| 🥫 Tripwire Alarms | 30 | 6 scrap | — | Unlocks Tripwire Cans: early warning on the approaches. |
| 🧱 Sandbags | 35 | 4 cloth | — | Unlocks Sandbag Nests: guard posts with cover. |
| 🌱 Farming | 45 | 10 food | — | Unlocks Farm Plots. |
| 🏹 Crossbows | 60 | 10 wood, 10 scrap | — | Craft silent crossbows. Idle crafters also make bolts (wood + scrap). |
| ⚒️ Smithing | 60 | 15 scrap | — | Craft machetes and scavenger kits. |
| 🩺 Field Medicine | 60 | 3 medicine, 6 cloth | — | Craft medkits. Medics heal 50% faster. |
| 🍾 Molotovs | 50 | 8 scrap, 4 cloth | — | Craft molotovs for the leader (G). |
| ⚒️ The Craftsman Era | 160 | 40 wood, 20 scrap | — | Needs: a Workshop, 3 inventions and 8 survivors. Unlocks the Craftsman tier. |
Craftsman Era
| Invention | Points | Cost | Requires | Unlocks |
|---|---|---|---|---|
| 🔥 Forge | 70 | 20 stone, 10 scrap | — | Unlocks the Forge: scrap → metal. |
| 🏰 Masonry | 90 | 30 stone | Reinforcement | Unlocks Stone Walls. |
| 🪜 Firing Platforms | 55 | 10 planks | — | Walkways behind the walls so guards can shoot over them. |
| 🛡️ Gate Upgrade | 70 | 10 planks, 4 metal | Forge | Unlocks the Reinforced Gate (upgrade in place). |
| 🕳️ Trenches | 50 | 10 wood | — | Unlocks spiked Trenches. |
| 🏯 Stone Towers | 100 | 30 stone, 5 metal | Masonry | Unlocks Stone Watchtowers (upgrade in place). |
| 🍖 Smokehouse | 60 | 6 planks | — | Unlocks the Smokehouse: smokes fresh food so it keeps, and makes meals. |
| 🪡 Tailoring | 55 | 10 cloth | — | Unlocks the Tailor: warm clothing for cold nights. |
| 🚰 Water Pump | 80 | 6 metal, 10 stone | Forge | Unlocks the Water Pump: steady water, no staff. |
| 🦺 Body Armor | 80 | 20 scrap, 10 cloth | Smithing | Craft riot vests. |
| 🔸 Reloading Bench | 70 | 20 scrap | Smithing | Idle crafters reload spent cases: scrap → rounds of the calibre your guns are shortest of. |
| 💡 Generator | 100 | 30 scrap | Reinforcement | Unlocks Floodlights. |
| 🔦 Spotlights | 60 | 4 metal | Generator | Unlocks Spotlights: long beams that reveal the night. |
| 🏘️ The Settlement Era | 260 | 40 planks, 20 metal | — | Needs: a Forge, a Sawmill, a water source and 12 survivors. Unlocks the Settlement tier. |
Settlement Era
| Invention | Points | Cost | Requires | Unlocks |
|---|---|---|---|---|
| 🪴 Greenhouse | 110 | 10 planks, 4 metal | — | Unlocks the Greenhouse: food and herbs in any season. |
| 💉 Antiserum | 140 | 10 medicine | Field Medicine | Craft a cure for bites. |
| 📡 Radio | 120 | 25 scrap | Generator | Unlocks the Radio Mast: attracts survivors. |
| 📻 Radio Network | 160 | 10 metal, 20 scrap | Radio | The mast reaches further: survivors arrive twice as often. |
"Points" are Crafter work: 0.45 + 0.11 × Crafting skill per second, with bonuses.
Eras
Research comes in three tiers. To move up an era you must meet its milestones, then research the era project:
- Craftsman Era (160 points, 40 wood + 20 scrap): a Workshop, 3 inventions and 8 survivors.
- Settlement Era (260 points, 40 planks + 20 metal): a Forge, a Sawmill, a water source (Water Pump, Well or Rain Collector) and 12 survivors.
Specialisations
When someone reaches level 5 in a skill, you choose a specialisation for them. At level 10 you choose again, between an unpicked level-5 option, Master or Mentor. Offers wait in the decision tray one at a time.
| Skill | Specialisations at 5 | At 10 |
|---|---|---|
| 🎯 Shooting | Sharpshooter: +25% sight range — spots and picks targets from farther away. Silent Shooter: Makes half the noise when shooting or working. | Master Shooting: +20% sight and +10% speed Mentor: everyone working as Guard / Escort gets +10% while the mentor lives |
| 🗡️ Melee | Brawler: +25 max health, moves 6% faster. Bodyguard: +12% speed as Escort or Guard — always where the fight is. | Master Melee: +20% sight and +10% speed Mentor: everyone working as Guard / Escort gets +10% while the mentor lives |
| 🪓 Woodcutting | Lumberjack: +35% woodcutting speed. Hardy: +15 max health and +15% woodcutting. | Master Woodcutting: +25% work speed as Woodcutter Mentor: everyone working as Woodcutter gets +10% while the mentor lives |
| ⛏️ Mining | Quarrymaster: +35% quarrying speed. Stonemason: +20% building and +15% quarrying. | Master Mining: +25% work speed as Quarrier Mentor: everyone working as Quarrier gets +10% while the mentor lives |
| 🔍 Scavenging | Pack Rat: +25% scavenging speed. Treasure Hunter: Scavenging trips sometimes turn up extra gear. | Master Scavenging: +25% work speed as Scavenger Mentor: everyone working as Scavenger gets +10% while the mentor lives |
| 🔨 Building | Engineer: +35% construction and repair speed. Fortifier: Patches damaged walls nearby every hour, even off shift. | Master Building: +25% work speed as Builder Mentor: everyone working as Builder gets +10% while the mentor lives |
| 🩺 Medicine | Field Surgeon: +40% healing speed. Herbalist: Gathers medicinal herbs while working as a medic. | Master Medicine: +25% work speed as Medic Mentor: everyone working as Medic gets +10% while the mentor lives |
| 🛠️ Crafting | Tinkerer: +35% speed at the workshop and production stations. Inventor: +50% research speed as a Crafter. | Master Crafting: +25% work speed as Crafter / Artisan Mentor: everyone working as Crafter / Artisan gets +10% while the mentor lives |
| 🌱 Farming | Green Thumb: +35% farming, cooking and greenhouse output. Forager: +20% scavenging — knows what the land offers. | Master Farming: +25% work speed as Farmer / Cook Mentor: everyone working as Farmer / Cook gets +10% while the mentor lives |
| 👁️ Scouting | Eagle Eye: +35% sight range. Tracker: Hears the dead 50% farther away. | Master Scouting: +20% sight and +10% speed Mentor: everyone working as Guard / Scavenger gets +10% while the mentor lives |
Treasure Hunter: while scavenging outside the territory there is a 12% chance per hour to find an extra item. Herbalist: medics gather 1 herb per hour half the time. Fortifier: every hour, damaged structures within 14 m regain 40 health.
Item tables
Weapons
| Weapon | Type | Damage | Range (m) | Seconds / attack | Noise (m) | Ammo | Accuracy | Craft | Notes |
|---|---|---|---|---|---|---|---|---|---|
| 🪵 Improvised Club | melee | 9 | 1.4 | 0.9 | 5 | — | — | 2 wood · work 3 | A length of timber with a nail or two. Better than bare hands. |
| 🔪 Kitchen Knife | melee | 11 | 1.3 | 0.55 | 3 | — | — | found only | Quick and quiet. |
| 🏏 Baseball Bat | melee | 17 | 1.6 | 0.85 | 6 | — | — | 6 wood · work 8 | Reliable crowd control. |
| 🗡️ Machete | melee | 25 | 1.6 | 0.8 | 4 | — | — | 12 scrap · work 14 · needs Smithing | Heavy, sharp, efficient. |
| 🪓 Fire Axe | melee | 26 | 1.7 | 1 | 6 | — | — | found only | Weapon and tool: +40% woodcutting. |
| 🔧 Crowbar | melee | 15 | 1.5 | 0.8 | 6 | — | — | found only | Weapon and tool: +40% scavenging. |
| 🔱 Spear | melee | 19 | 2.4 | 0.9 | 3 | — | — | 5 wood, 3 scrap · work 8 | Long reach — great on walls. |
| 🔫 Pistol | ranged | 24 | 17 | 0.55 | 38 | 🔸 9 mm rounds · 15 per magazine | 0.72 | found only | Loud. Every shot rings for blocks. 9 mm, 15-round magazine. |
| 🎯 Hunting Rifle | ranged | 55 | 30 | 1.4 | 55 | 🔺 .308 rounds · 5 per magazine | 0.86 | found only | Long range, very loud. .308, 5 in the box magazine. |
| 💥 Shotgun | ranged | 13 × 6 pellets | 10 | 1.2 | 50 | 🔴 12-gauge shells · 6 in the tube | 0.6 | found only | Devastating up close. Deafening. 12-gauge, 6 in the tube, loaded shell by shell. |
| 🏹 Crossbow | ranged | 40 | 22 | 1.7 | 4 | 🪶 Crossbow bolts · 1 per magazine | 0.8 | 10 wood, 10 scrap · work 20 · needs Crossbows | Silent killer. Shoots bolts, which can often be pulled out of the dead. |
Skill matters: every Shooting level adds 2.5% accuracy and 3% fire rate. Melee damage is multiplied by 0.8 + 0.06 × Melee. Shotgun damage falls off with distance. Brave adds 10% damage.
Tools
| Item | Effect | Craft |
|---|---|---|
| 🪓 Hatchet | +50% woodcutting speed. | 4 wood, 4 scrap · work 8 |
| ⛏️ Pickaxe | +50% quarrying speed. | 4 wood, 6 scrap · work 10 |
| 🔨 Hammer & Nails | +50% building speed. | 2 wood, 5 scrap · work 8 |
| 🧰 Scavenger Kit | +50% scavenging speed and better finds. | 8 scrap, 2 cloth · work 10 · needs Smithing |
| 🎣 Fishing Rod | Fishers with a rod catch 2.5× more fish. | 3 wood, 1 cloth, 1 scrap · work 6 |
| 📻 Walkie-talkie | A pair keeps you in touch with camp within 300 m (anywhere with a Radio Station): decisions wait for you instead of the deputy. You need two: one goes with you, one stays. | 6 scrap, 1 cloth · work 8 |
Armor
| Item | Effect | Craft |
|---|---|---|
| 🧥 Leather Jacket | -15% damage, -37% bite chance. | 8 cloth · work 10 |
| 🦺 Riot Vest | -30% damage, -75% bite chance. | 8 cloth, 12 scrap · work 18 · needs Body Armor |
| 🧥 Warm Coat | Protects from cold nights (−70% chance to fall ill) and keeps working speed in the cold. −5% damage. | 10 cloth · work 14 |
| 🪖 Combat Helmet | -12% damage, -30% bite chance. Taken off a dead soldier. | found only |
Packs
| Item | Effect | Craft |
|---|---|---|
| 🎒 Backpack | +15 carry capacity. | 6 cloth · work 8 |
| 🧳 Hiking Rucksack | +30 carry capacity. | found only |
| 🧸 Keepsake | Something from before. +4 carry, and it keeps them going. | found only |
Supplies
| Item | Effect | Craft |
|---|---|---|
| 🩹 Bandage | Heals 30 health. | 2 cloth · work 4 |
| 🧰 Medkit | Heals 80 health. | 3 cloth, 2 medicine · work 10 · needs Field Medicine |
| 🍾 Molotov | Leader throwable (G). Burns an area. | 1 cloth, 2 scrap · work 6 · needs Molotovs |
| 💉 Antiserum | Cures a bite if given in time. | 6 medicine · work 20 · needs Antiserum |
| 🧴 Bottled Water | Two servings of clean water (added to camp water when stashed). | found only |
| ☕ Instant Coffee | Used automatically on someone exhausted: −35 fatigue. | found only |
| 🩹 Clean Bandage | Stops bleeding. Wounds bandaged cleanly rarely get infected. | 2 cloth, 1 water · work 5 |
| 🦴 Splint | Sets a fracture: heals ~40% faster. | 3 wood, 1 cloth · work 5 |
| 💊 Antibiotics | Cures an infection outright. | 3 medicine, 2 herbs · work 14 · needs Field Medicine |
| 🌿 Herbal Remedy | Halves illness time; stops an infection from worsening. | 3 herbs · work 6 |
| ⏰ Wind-up Alarm Clock | Throw (V): rings for 40 s, pulling the dead toward it. | 3 scrap · work 6 |
| 🧨 Firecrackers | Throw (V): a loud 8 s burst heard far away. | 1 scrap, 1 cloth · work 6 |
| 🎇 Road Flare | Throw (V): burns bright for 60 s — lights the area and draws them, especially at night. | 2 scrap, 1 fuel · work 6 |
| 📻 Battery Radio | Throw (V): plays static for 3 minutes. The best herd bait. | 6 scrap · work 6 |
| 🚨 Car Alarm Rig | Throw (V): screams for 30 s. Everything within 60 m comes running. | 5 scrap · work 6 |
A molotov lands up to 18 m away and burns an area 3 m across for 7 seconds, setting the dead alight. Bottled water that reaches the stash turns into 2 camp water.
Hard facts
Ammo, light, food and wear
Four things that work the way they do in the real world. Each has a way to deal with it and something on screen that tells you where you stand.
Ammo by calibre
- Every gun eats its own rounds: the Pistol 9 mm, the Hunting Rifle .308, the Shotgun 12-gauge shells, the Crossbow bolts. Each calibre is its own resource (🔸 🔺 🔴 🪶 in the top bar, shown once you have some). A calibre that a gun in the group uses turns red when fewer than 5 rounds per gun are left.
- Where it turns up depends on the place: police stations and towns give mostly 9 mm, military checkpoints .308, farms shells (and hunters' .308), the wild a mix. The dead carry the rounds of the place they fell. Bolts are never found: the workshop makes them and you pull them out of the dead.
- Magazines. A gun holds a magazine (a tube for the shotgun). When it's empty the shooter reloads: nobody fires while a magazine is changed, so a reload in a fight is a moment you're exposed. The shotgun loads shell by shell and can fire again as soon as one is in. People top up their magazine between fights by themselves (it takes the same time).
- Your card shows the gun, its calibre, what's in the magazine and what's spare, e.g.
9 mm 12/15 · 38(you draw on the camp store wherever you are), and ⟳ reloading, ⚠ JAMMED or ✖ broken. When your calibre runs out you switch to your sidearm. - People in camp get rounds of their own calibre every hour (up to 12) and after a delivery (up to 18). If someone's gun has nothing left to eat, at camp they swap it for a gun in the stash that has at least 6 rounds. Auto-equip prefers guns you can feed.
- Counters: the Reloading Bench invention (idle crafters turn scrap into rounds of the calibre you're shortest of), the Crossbows invention (idle crafters make bolts from wood and scrap; a new crossbow comes with 8), searching bodies (about 4 bolts in 5 can be pulled out again), and traders, who sell the calibre you need most. Tributes, gifts and peace terms ask for "rounds" of any kind: the biggest piles pay first.
| Gun | Calibre | Magazine | Reload | Wear per shot | Where the rounds turn up |
|---|---|---|---|---|---|
| 🔫 Pistol | 🔸 9 mm rounds | 15 | 1.6 s | 0.3 % | police stations, towns, gas stations, markets, the dead in town |
| 🎯 Hunting Rifle | 🔺 .308 rounds | 5 | 2.8 s | 0.45 % | military checkpoints, farms (hunters), cabins in the wild |
| 💥 Shotgun | 🔴 12-gauge shells | 6 (tube) | 0.5 s per shell (can fire mid-load) | 0.4 % | farms, police stations, towns |
| 🏹 Crossbow | 🪶 Crossbow bolts | 1 | 0.6 s | 0.25 % | made at the workshop (Crossbows invention), pulled out of the dead, traders |
Light at night draws the dead
- At night a light is seen from far away. Your fires, lit workplaces (kitchen, forge, smokehouse), floodlights and spotlights, a burning pit, your flashlight, headlights and every muzzle flash can make one of the dead wander over to look. The further away, the less likely. Fog and rain hide lights; a wall or a hill between them hides the flame but not the glow on the smoke. Dozers and herd walkers mostly don't bother.
- Your flashlight (F) is a beam: anything standing in it within about 45 m may come to look, and one that is close (under 24 m) sees who is holding it. Turn it off to move unseen, at the price of seeing less.
- The top bar at night shows how far the camp is seen (🔥 seen ~40 m), 🔦 when your flashlight is on, and 👁️ how many of the dead came to look tonight. At 07:00 a note says how many came and to what.
- Counter: Blackout (📜 Rules → Night & watch). No fires or lamps after dark: the camp is dark and draws nothing. But it's cold: the fire gives no warmth at night (colds in cold weather), guards lose the light of the fire and the floodlights, and everyone's morale drops by 3 (6 in cold weather) while the rule is in force.
- A campfire is a trade-off, not a death sentence: over a whole night about half of the wanderers 20 m out come over, a few from further. Walls and guards deal with them; the nightly horde comes anyway.
| Light at night | Seen from (m, full dark, clear) | Chance per look, close by | Behind a wall |
|---|---|---|---|
| Campfire | 40 | 0.25 % | glow 35 % |
| Lit workplace | 26 | 0.15 % | glow 30 % |
| Floodlight | 60 | 0.40 % | glow 20 % |
| Spotlight | 70 | 0.30 % | glow 10 % |
| Burning pit | 38 | 0.30 % | glow 40 % |
| Flashlight beam | 45 | 5.00 % | not seen |
| Flashlight | 16 | 1.50 % | not seen |
| Muzzle flash | 70 | 35.00 % | glow 15 % |
| Headlights | 55 | 3.00 % | not seen |
Food spoils
- Food from the farm, the greenhouse, fishing, berry bushes and crop fields is fresh. It keeps a few days: less in the heat, much longer in the cold. Tins and jars from the ruins, and everything preserved, keep.
- The top bar shows the fresh part next to your food (🍎 12). It turns orange with ⚠ when some will spoil within a day, and at 18:00 a warning says how much. Food past its time rots away over a few hours.
- Everyone eats the oldest fresh food first, and so does everything else that takes food (cooking, trading, thieves).
- Heavy rain speeds up rotting unless you have a Storage Shed, and it soaks a little of the preserved food too (0.4% an hour with more than 20 food, 0.1% with a shed).
- Counter: preserving. A Cook at the Kitchen dries and salts fresh food as they cook (about 1 unit for every 8 units of work). An Artisan at the Smokehouse smokes it twice as fast, for a little wood (1 wood per 5 food). Preserving doesn't change the amount, only how long it keeps.
| Season | Typical temperature | Fresh food keeps about |
|---|---|---|
| Late Summer | 21 °C | 2.0 days (1.5 in rain without a shed) |
| Autumn | 14 °C | 3.2 days (2.5 in rain without a shed) |
| Late Autumn | 8 °C | 4.9 days (3.7 in rain without a shed) |
| Winter | 1 °C | 7.9 days (6.1 in rain without a shed) |
Wear and repair
- Every weapon and tool has a condition, shown as a thin bar on its card in the stash and on the equipment slots (green, yellow below 60%, red below 25%). Guns wear with every shot, melee weapons with every hit, tools with the work they do.
- Below 60% a gun is dirty and can jam: the shot doesn't go off and clearing it takes about 2 seconds. The dirtier, the likelier (up to about 1 in 10 just before it breaks). Above 60% a gun never jams.
- At 0% an item breaks: it goes into its owner's bag (and so to the stash) and stops working. An improvised club just splinters: people in camp make a new one for 2 wood.
- Counter: the workshop. In the Craft panel (T → Crafting orders…, or the Workshop) the 🔧 Repairs list shows every worn item with its cost in scrap. Click Repair: a Crafter (or you, with E at the workshop) does the work, repairs before anything else in the queue. An item that is away with someone waits until they're back.
| Use | Condition lost |
|---|---|
| 🔫 Pistol: per shot | 0.3 % |
| 🎯 Hunting Rifle: per shot | 0.45 % |
| 💥 Shotgun: per shot | 0.4 % |
| 🏹 Crossbow: per shot | 0.25 % |
| 🪵 Improvised Club: per hit | 1.6 % |
| 🔪 Kitchen Knife: per hit | 0.5 % |
| 🏏 Baseball Bat: per hit | 0.35 % |
| 🗡️ Machete: per hit | 0.3 % |
| 🪓 Fire Axe: per hit | 0.3 % |
| 🔧 Crowbar: per hit | 0.2 % |
| 🔱 Spear: per hit | 0.45 % |
| Woodcutting tool: per game hour of work | 0.90 % |
| Mining tool: per game hour of work | 1.05 % |
| Building tool: per game hour of work | 0.45 % |
| Scavenging tool: per game hour of work | 0.60 % |
Needs
Needs, weather and seasons
Food
- At midnight everyone eats 1 food (a Glutton eats 2). A Cook with a Kitchen cuts this by 40%. Half rations (from a decision) halve it for 2 days.
- If food runs out, that many people go hungry: −15 morale and −10 health each.
- Rain and food: see Food spoils. Heavy rain speeds up the rotting of fresh food without a Storage Shed and soaks 0.4% of the preserved food an hour (0.1% with a shed).
Water
- Hydration runs from 100 down to 0. It drops 2.4 per hour: 30% faster above 24°C, 35% faster while working (or moving, for you), half as fast asleep, and 40% slower on Day 1.
- Below 62, people drink: 1 camp water inside the territory (before you claim a camp, from the shared supply anywhere), else a canteen serving, for +45. In camp, canteens (2 servings) refill whenever the camp has 3 or more water.
- Drinking unboiled water: if the camp has no Campfire, each drink has a 4% chance of food poisoning. Raw river and lake water carries its own risk until it's boiled or filtered (see Water and fish).
- Below 30 people are thirsty (work ×0.85, morale −6). Below 12 they are parched: work ×0.6, speed ×0.85, and −3 health per hour (−6 at 0). Below 8, with no camp water, they can't work.
- Sources: the old Well (1 per hour), Rain Collector (3 per hour in full rain, 0.2 when overcast), Water Pump (4 per hour), Water Carriers and the River Intake (raw water), bottled water (2 each), crates (45%: 2 to 5 water), wrecks (20%: 1 to 3). The group starts with 12. The 💧 widget shows how many days the water lasts at 1.3 per person per day.
Fatigue
- Fatigue runs from 0 (rested) to 100. Per hour: heavy jobs (Woodcutter, Quarrier, Builder, Undertaker) +4.2, other work +3, Escort +2.4, anything else +1, Rest −3, resting by the fire while blocked −4. Sleeping in a bed recovers 15, on the ground 8. You gain 2.2 while moving and recover 6 standing still in camp at night.
- Above 70, work speed drops to 80%. Above 85, to 65%, and speed to 85%. At 95 a follower collapses and goes to bed until fatigue is below 55, at any hour.
- People on the Follow job, and anyone ordered to follow you, go to bed at night once you are inside the walls. They get up and follow again as soon as you leave.
- Nobody walks into a wall for ever. If someone can't reach a spot for about 10 seconds, they give up on it for a while and pick something else: another tree, another wall section, another post. If they can't reach their bed, they sleep rough where they are. Their card shows why ("Can't reach it — trying something else", "Can't reach the Watchtower").
- Guards don't go to bed at night unless they are tired: above 60 fatigue a guard stands down and sleeps, unless on the night shift.
- Above 80 in camp, someone drinks a coffee from the stash if there is one (−35).
- Heavy jobs above 70 fatigue risk accidents (a 3% chance of a wound per hour).
Injuries
| Injury | How you get it | Effects | Treatment |
|---|---|---|---|
| 🩸 Wound (up to 3) | Losing 6+ health at once (35%). Accidents. | While unbandaged: −1.2 health per hour for its first 20 hours. Unbandaged for more than 10 hours: 5% per hour to become infected. Heals after 36 hours bandaged, 60 unbandaged. Bleeding people are easier to smell. | Clean Bandage, Bandage (15% chance it wasn't clean), or 1 medicine. |
| 🦴 Fracture | Losing 15+ health at once (8%). | Speed ×0.6 (×0.75 splinted), work ×0.7. Heals after 60 hours splinted, 96 hours not. | Splint, applied by a medic. |
| 🦠 Infection | An untreated wound. | −0.8 health per hour (−2 after 48 hours) until treated. Work ×0.75. | Antibiotics clear it at once. A Herbal Remedy treats it (it clears 72 hours after it began). |
Treatment happens every hour, in camp. With a medic on duty wounds are always bandaged. Without one, people bandage themselves 60% of the time. Splints need a medic. Treated injuries heal twice as fast within 8 m of an Infirmary, and 30% faster with a medic on duty. Each injury lowers the morale target by 3.
Illness
| Illness | Lasts | Effects | Caught from |
|---|---|---|---|
| Cold | 48 h | Work ×0.8, noise ×1.25 | A night below 5°C away from a campfire or bunkhouse (2% per hour; ×0.3 with a Warm Coat, ×1.5 in rain, ×0.5 in a real bed). Being out in heavy rain. |
| Flu | 72 h | Work ×0.6, bedridden for the first 24 h, noise ×1.25 | Winter (0.2% per hour). |
| Food poisoning | 18 h | Work ×0.5, −1 health per hour, can't work for the first 8 h | Unboiled water. |
A Herbal Remedy halves the remaining time. Medics and treatment speed recovery. Illness lowers the morale target by 4. People can die of thirst, bleeding, infection or illness.
Weather
- The weather changes every 3 to 9 hours. Day 1 stays clear until the evening. Fog mostly forms between 03:00 and 10:00.
- Rain: noise carries up to 25% less, the dead see up to 15% less, you see up to 15% less, outdoor work is up to 12% slower, smell range halves, morale −1.5, and rain collectors fill.
- Storm: all of the above plus another 20% off noise and 15% off the dead's sight, outdoor work another 15% slower, strong wind, lightning, morale −3.
- Fog: you see up to 45% less and the dead up to 40% less.
- Clear days lift morale by 1. Overcast is 1°C colder.
- Outdoor jobs are Woodcutter, Quarrier, Scavenger, Builder, Farmer, Undertaker and Guard.
Seasons and temperature
| Days | Season | Base temperature | Weather odds (clear / overcast / rain / storm / fog) |
|---|---|---|---|
| 1–7 | Late Summer | 21°C | 45 / 25 / 15 / 5 / 10 |
| 8–14 | Autumn | 14°C | 25 / 30 / 25 / 8 / 12 |
| 15–21 | Late Autumn | 8°C | 20 / 30 / 28 / 10 / 12 |
| 22+ | Winter | 1°C | 30 / 35 / 15 / 5 / 15 |
The temperature swings 6°C around the base during the day, warmest at 15:00. Rain takes off up to 3°C. Below 5°C it counts as cold: work without a Warm Coat is 10% slower, morale −2, and nights make people sick. From Late Autumn you are reminded at 17:00 (half the time) to keep people warm.
The world changes with the seasons too (autumn colours, bare trees, snow that slows everyone, frozen lakes): see Seasons you can see.
Leadership
Decisions, trust and authority
Things happen that need a call: a thief, a bite, a stranger at the gate. Decisions never interrupt a fight.
The decision tray
- New decisions wait in the tray ("⚖️ N decisions waiting"). One opens by itself once nobody has been in combat for 4 real seconds and the game isn't paused. Click the tray to decide now. Hover it to see what is waiting, including hours left for the bitten.
- You are "in combat" while anyone has a threat or a living zombie within 18 m.
- The game stops while a card is open. Some outcomes lead straight into a follow-up question.
- A decision about someone who died, left or was recruited meanwhile is dropped.
- After the camp is claimed, a random event is drawn every 3 to 7 hours.
Reading a decision card
- The header shows the event's icon, its title and, on the right, the face of the person it is about. If someone else decided while you were away, their face appears under "Decided by".
- Each choice is a column: its number key, the choice and its hint. On cards the group can vote on, a bar from mercy to harsh shows how hard the choice is, and under it the likely backers: the faces of the people who lean that way, with a count and a bar.
- The backers are your best guess from what you know: their known traits, their morale, and the rule that people vote for mercy on themselves. A faded face could go either way. A ? means they have traits you haven't seen yet, so they may surprise you. The frame shows how they feel about you: green likes you, red resents you.
- Each face has a small job icon (👑 for the leader) and, when known, a trait icon: 💪 Hard Worker, 😴 Lazy, 🦁 Brave, 🐇 Coward, 👁️ Sharp Eyes, 👂 Keen Ears, 🦉 Night Owl, ✨ Charismatic, 🔥 Hothead, 🍗 Glutton, 🦝 Thief, 🧨 Saboteur, 🐺 Loner, 💗 Kind-hearted, 🧱 Tough, 🥀 Frail, 🤫 Quiet. Hover a face for details. Click one outside a choice column to open that person.
- Keys: 1–9 pick a choice, V lets the group vote, Enter continues after the outcome. While a card is open these keys only act on the card: the number keys don't change the game speed and V doesn't throw a lure.
The outcome
- After a vote: one column per choice with the faces of everyone who voted for it, the count and a bar. The winning column is gold, with a ✔.
- After your own call on a votable card: two columns, 👍 Agreed and 👎 Wanted something else. Each face in the second column says which choice they wanted. These are the same people who remember being overruled.
- Effects are shown as small icons with numbers: 🤝 Trust and 👑 Authority up or down, 🙂 the average morale change, 👍/👎 how many now think better or worse of you, every resource and stash item gained or spent.
- People shows who was affected: a crossed-out face for anyone who died or left (an exile), "joined" for newcomers, and a badge for anyone whose job changed, who was locked up or released, or whose morale or loyalty moved by 5 or more.
- The story text of the outcome sits underneath. Small choices (specialisations) skip the outcome and show a short notice instead.
Decide alone, or let them vote
- Let the group decide (🗳️, only on some cards): everyone except you votes. Trust +4, Authority −2. You live with the result.
- Decide yourself on a votable card: Authority +3. The group votes silently. If at least half agree, Trust +2. If not, Trust falls by up to 4.
- How people vote: each person's leaning is the sum of their traits' vote weights (×0.6) plus their morale (higher morale leans harsher). They pick the choice closest to it, with some randomness. The person the decision is about always votes for the most lenient option.
- People remember being overruled: an opinion hit on you, and sometimes a memory. Harsh calls against someone count as punishing them, and their friends and family resent you for it. Lenient calls toward them make them like you more.
What Trust and Authority do
- Trust (starts 55) sets everyone's morale target:
35 + 0.35 × Trust. Add +5 for a campfire, +3 for a Bunkhouse, +6 for a working cook, −1.2 per rotting corpse, −10 for Loners in a group of more than 6, +6 near a Charismatic person, and every need, weather, law and relationship effect. Morale moves 8% of the way to its target every hour. Trust also improves the odds when you talk someone out of leaving. - Loyalty drifts every hour with morale and trust, and with how much the person likes you.
- Authority (starts 50) pays for decreeing and repealing laws, and it's what a bluff with raiders rolls against.
Decisions you'll meet
- Recruiting someone you found: invite them (they join with 60 loyalty), ask about their past (reveals every trait, −10 loyalty, they join), or leave them.
- A stranger at the gate (random, or drawn by the Radio Mast): let them in, turn them away, or question them first. After questioning: welcome them, accept on conditions (they hand over their weapon and do corpse duty), probation (the next three nights on the night watch, on top of the rota), or turn them away. Harsh laws make newcomers less loyal and keep some away. Kind laws make them more loyal.
- Bitten: the card says where the bite is. Use antiserum (if you have one), amputate the bitten hand, arm or leg (not for a torso or neck bite: see Amputation; its hint shows the odds right now, and they fall every hour the card waits), quarantine (they walk to the quarantine tent at the edge of camp, sleep there, and by day do the workshop's bench work there with no contact: craft orders, repairs, research; a check-up follows in a few hours: the fever breaks 30% of the time, always if an amputation was in time; otherwise you choose mercy, company, or "try everything" for 3 medicine and a 25% chance), mercy, or let them keep working. After an amputation a second card asks whether they wait in quarantine or among you.
- Funeral: bury them (+8 morale for all) or burn the body (−2).
- The random deck: a thief caught with food, a fight between a Hothead and someone, a person who wants to leave, a guard asleep on watch, a hidden stash of painkillers, sabotage at night, the pantry almost empty, someone offering to teach a skill (both spend an afternoon, 4 working hours, on it, off their jobs; the skill comes at the end), a suggested feast, nightmares, a memorial for the lost, and a neutral pedlar's cart (by day; not while you are at war with every group you know, and rarer while a friendly trader faction visits).
- Social events (romance, feuds, confessions), quests, faction visits, perk choices and expedition reports use the same tray.
- Some deck cards are settled by your laws instead. You're told the result ("By camp law: …").
Leadership
Deputy & the return brief
When you leave a camp, someone has to keep it. Each camp has its own deputy who runs things while you're away from it, and when you come back to that camp you get a report of everything that happened there.
When you count as away
- You are away from a camp once you are more than 15 m beyond its walls, and back when you are within 6 m of them again. With two camps, standing in one means being away from the other, and its deputy runs it. A small badge at the top says who runs the camp (or how many camps deputies are running) and whether you're in touch.
- Walkie-talkies (📻, craftable at the workshop for 6 scrap and 1 cloth, and sometimes found in crates and wrecks) keep you in touch. You need two (in that camp's stash or in anyone's bag): one goes with you, one stays at camp. They reach 300 m from that camp's centre, or anywhere once that camp has a Radio Station. In touch, decisions wait for you in the tray as usual.
- Out of touch, the deputy decides.
Who the deputy is
- Pick one per camp: 🎖️ Make deputy in a person's details (they run the camp they live at), or the Deputy dropdowns in the U Party panel (one per camp). The roster marks them 🎖️.
- If you haven't picked anyone, or your pick is in your party, hurt in quarantine or gone, the most trusted adult who lives at that camp and is there steps in (a deputy who is killed is replaced the same way): loyalty, what they think of you, morale, and a bonus for the Charismatic. Known thieves and saboteurs are only picked when there is nobody else.
How the deputy decides
- By their own character: kind people pick mild choices, hotheads hard ones (their traits' vote weights, as in a vote, plus their mood). They go easier on someone they like and harder on someone they don't. The more loyal they are, the more they try to decide the way you have been deciding.
- Limited powers. A deputy never exiles or executes anyone: when that's what they'd choose, the card waits for you. Only the cards about their own camp are theirs, paid from that camp's stock: they never spend more than 20% of any of its stocks on one card, don't decide anything that costs the leader (your health, your sleep), and don't decide a stranger at the gate, a bite, a storyline, or a successor.
- They leave some for you. The card waits when they can't make up their mind (two choices almost equally good to them), when it's high stakes (a harsh choice, a big spend of 10 or more of anything), or when it's about them or someone close to them (a friend, partner, family or rival). These cards say "⏳ Waiting for you — <deputy> didn't want to decide this" and the reason, stay in the tray without popping up, and open as normal once you're back or in touch.
- Cards that can't wait. A bite waits for you only until the bitten person has about 5 hours left (a quarantine report, 2 hours). Then the deputy takes the careful way (quarantine; for someone who is getting worse, someone sits with them until the end) and the brief says so.
- What it costs you. Every call made without you: Trust +1 if most people agree with it, −1.5 if not, and Authority −0.6 (−0.3 for a card that couldn't wait). The person it was about warms to or resents the deputy; so, a little, does everyone else.
The deputy keeps order
- By day, every hour: anyone on Rest who could work is put to work (a Builder if blueprints wait, else wood, food, or stone).
- The night watch is set (see Day jobs); the alert says the deputy set it.
- Without an Alarm Bell, the deputy calls everyone inside when the dead come within about 18 m of the walls while people are outside.
- At night nobody on the night shift works outside the walls while you're gone; their night shift comes back at 06:00 or when you return.
While you were away (the return brief)
From the moment you leave a camp, that camp keeps a record. Come back to it after an hour or more (or sooner if its deputy decided anything) and its 📋 While you were away panel opens, named after the camp: the time you were gone, who kept the camp, counts at a glance, the change in every resource, and cards for:
- decisions the deputy made (who, what they chose, what came of it) and the ones waiting for you, with the reason;
- deaths, injuries and bites; attacks, breaches and structures lost; who arrived and who left;
- what was built; how the deputy kept order (the night watch, people put to work, the alarm); and story beats.
Back to work or Esc closes it; Decide what waited opens the first waiting card. The last briefs stay in the journal (J): its top entry links to each one.
Leadership
Founding charter & petitions
When you claim your first camp, everyone gathers around the fire to agree the rules. Later, people who don't like a rule can ask for a change, and you decide what to do with their petition.
The founding meeting
The charter screen opens by itself right after the claim, and the game pauses while it's open. Across the top, the group sits around the fire: a ✔ or ✖ on each face shows whether that person would sign the charter as it stands, judged from what you know about them. The Support meter shows the share who would sign. Below are seven cards, one per article. Each card offers 2–4 options as chips, and each chip counts how many people like 👍 and dislike 👎 it. Under the chosen option you see what it does and one row of faces: ✔ for those who like it, ✖ for those who don't.
| Article | Options | What it sets |
|---|---|---|
| 🎒 Property | Shared stash · Finders keep a share · The leader hands out | The property law. Finders keep: a follower keeps about 25% of every find (the camp never sees it), and the finder gets +2 morale per find; theft is rarer. Shared: nothing is held back, but theft is more likely. The leader hands out: nothing is lost, +1 Authority every morning, and loners and thieves resent it. |
| 🍖 Rations | Equal shares · Workers first · The weak first | The ration law (see Laws). |
| ⚖️ Justice | Exile · Work it off · Group decides · Second chance | The justice law. The group judges: offences (theft, fights, sabotage, hoarding, sleeping on watch) are meant for a vote. Judging one yourself costs 3 Trust. |
| 🩸 The bitten | Quarantine · Mercy · Keep working, and an Also amputate limb bites switch | The bitten law. Amputation works alongside the others. |
| 🔦 Night watch | 1, 2 or 3 guards | The standing rule: how many extra guards go on watch at 19:00. |
| 🌙 Curfew | Curfew · Free to roam | The night curfew law. |
| 🏛️ Decisions | Leader decrees · Group votes · Council of 3 | How big calls are made (below). |
A person signs when their likes outweigh their dislikes. Their morale and what they think of you tip the balance. Hidden traits can surprise you in a real vote.
- Put it to a vote: it needs more than half. If it passes, +6 Trust and those who voted for it think better of you. If it fails you get +1 Trust for asking, the screen stays open, and each person who voted no shows their complaint over their head (the article they dislike most). Change something and try again.
- Decree it: it always passes. It costs 3–10 Trust (more the less popular it is) and gains 8 Authority. Those who didn't want it resent you and remember it.
- Decide later (or closing the screen, or leaving it for a whole day): sensible defaults apply (shared stash, equal shares, work it off, quarantine, 1 guard, no curfew, the leader decrees). But people want to know the rules: everyone's morale is 2 lower and you're reminded every morning until you hold the meeting. The Laws screen (L) has a Hold the founding meeting button.
- Outposts: claiming another camp asks one short question instead: does the charter hold there (+2 Authority), do they keep their own watch (+1 guard, +1 Trust), or does the outpost crew choose (+3 Trust, −1 Authority)?
How big decisions are made
A decision card is big when one of its choices is harsh (0.6 or more on the mercy–harsh bar). The Decisions article changes what happens when you decide a big card yourself. A banner on the card reminds you.
- The leader decrees: you get +1 Authority, and you lose only half the usual Trust when many disagree. With no voice, people raise petitions 25% more often.
- Big things go to a vote: the vote button glows. Letting the group decide costs nothing extra. Deciding yourself overrides the charter: −3 Trust, and the kind and the charismatic remember it. Petitions come 30% less often.
- A council of three: the three most respected people (what the others think of them, and their loyalty) advise. Their faces and leanings are on the card. Side with at least two of them: +1 Trust, +1 Authority. Go against them: −2 Trust, and each one who disagreed thinks less of you.
Petitions
Unhappy people can ask for a law to change: "Maya wants a vote on the Curfew. 9 people signed." A petition comes about once every few days, and more often when morale is low (roughly 1 in 4–5 days in a content camp, every 2 days when morale is below 40). Only one waits at a time, at most one a day, between 09:00 and 19:00, and only while you're at camp. Signers are people whose traits (and mood) make them prefer another law. The one who raises it is unhappy: low morale, a poor opinion of you, or strong feelings. It needs at least 2 signers and a fifth of the group.
The petition card shows the change (Now ➜ They want), the person who raised it, every signer as a face, your guess at whether it would pass a vote, and your veto count. You answer:
- Accept the change: the law changes. Signers get +6 morale and think better of you. +2 Trust, −2 Authority.
- Call a vote: everyone votes and the result binds. The outcome shows who voted for and against. Passing: the law changes, +3 Trust. Failing: the law stays, +1 Trust, and the signers lose 3 morale.
- Veto: the law stays. −4 Trust (−6 if half the camp signed), +2 Authority. Every signer thinks 10 worse of you, loses 4 morale and remembers it.
- Postpone: it comes back in a day (twice at most). Signers lose 2 morale.
After a petition is settled, that topic is quiet for 3 days. Your deputy never decides a petition. While you're away it waits in the tray.
Too many vetoes
Three vetoes within 10 days bring a leadership challenge a few hours later. Nobody wants a fight: the most put-out signer stands up at supper and asks whether you still lead for everyone. You can promise to listen (the veto count starts over, −6 Authority, +4 Trust), put your leadership to a vote (win: +8 Trust, +4 Authority; lose: −8 Trust, −10 Authority, and from then on big things go to a vote), or stand firm (+5 Authority, −6 Trust, the challenger resents it, and the vetoes still count).
The charter in the Laws screen
The Laws screen (L) starts with a 📜 Charter group: the founding date and whether it was voted or decreed, one pill per article with what is in force now, your vetoes in the last 10 days (out of 3), any open or postponed petition with its signers (and an Answer button), and a history for each topic: the charter's choice, then every change (decree, vote, petition, repeal) and every veto or failed vote, in order. Repeats are merged (×3), and hovering a step shows its date.
Stories
Stories & events
Everyone you meet has a life story written from parts, the camp remembers what happened, and two longer storylines run in every game. People bring up the past by themselves.
Life stories
Open someone's details to read Life before. Each story is put together from:
- A job that fits their two best skills and their age, from 43 jobs (ER nurse, logger, army reservist, scrap dealer, lay preacher…). Very old people are retired from it, and children are just kids.
- A hometown: usually a real town or farm on this map (farmers favour farms), otherwise somewhere far away.
- Family by age: single, married, kids, widowed, divorced. Each relative is dead, missing (last seen at a named place), far away, or here with you.
- Outbreak day: where they were. If their job matches a landmark on this map (nurse → the hospital, deputy → the sheriff's office, trucker → the gas station…), usually there. Otherwise it's something that fits their skills.
- Since then: how they survived. For people you find out in the world, it mentions where you found them.
- A goal (often to find a missing relative) and a fear.
- A secret. A hidden bad trait decides it (Saboteur, Thief, Coward, Glutton, Lazy). Otherwise it's something smaller and human: a painkiller habit, an old bite that never turned, being the driver when a relative died, a prison record, walking past someone who begged for help, a ring kept from a divorce, lying about their age, letters written every night to someone dead.
The starts keep their people's origins (your partner and children, the soldiers, the ex-convicts). The leader has no written story.
Secrets come out
- At 11:00 and 17:00 there is a 55% chance, at most once a day, that someone's secret shows a hint (🔎 in the alert log, and under "You've noticed" in their details): the count on the tins is off again, a sleeve that's never rolled up, a radio with a suspiciously fresh battery.
- Once two hints are out, a friend of theirs (or someone who likes them) may take you aside at 15:00, at most every two days. Talk to them privately and they confess. What happens next depends on the secret:
- A spy: exile them, or give them a second chance.
- Pills: help them taper off (1 medicine), or lock the medicine away.
- An old bite: keep it between you, or tell the group.
- A thief or a glutton: they put it all back, or you cut their rations.
- An undiscovered painkiller habit quietly costs the camp 1 medicine every third day.
Grief and what the camp remembers
- When someone dies, those close to them mourn: partners and family for 4 days, friends (or anyone who liked them a lot) for 2½ days, acquaintances for a day. Mourning lowers the morale target by up to 12 and work speed by up to 30%. Both fade as the days pass. A partner, family or their closest friend doesn't work for a full day (24 hours); anyone else loses about 2 hours and then goes back to work, slower. The person screen says which ("not working until 14:00", or "back at work, slower"). This comes on top of the short grief described in Relationships.
- The camp keeps a history: who died and where, who was exiled, who left or was evacuated, who joined and where you found them, how storylines ended. The 🧵 Threads panel shows the latest entries under "What the camp remembers".
- On their mind. Every evening at 20:00, one person says something (it appears in the alert log, and in their details for that day). It comes from what really happened: "Since you exiled Mara, I sleep with my boots on", a friend who died at a named place, a promise you made or broke, a decision they think you got wrong, a missing sister, their old job, half rations.
Threads: the storylines (🧵)
Each game picks two of six storylines from the seed. The first can begin on Day 2 or 3, the second on Day 4 to 6. Most need a claimed camp. Beats only come when things are calm: no fight, no horde within 90 m of the camp or 60 m of you, and fewer than four decisions waiting. They come by day unless you are already at the place. A storyline that can't begin within three days is swapped for another. Beats wait for time to pass, for someone to reach a real place (marked in purple on the minimap, and "📍 Show on map" in the panel), or for you to get home. If the person a storyline is about dies or leaves, it ends unfinished.
| Storyline | How it goes |
|---|---|
| 🕯️ Looking for … | Someone asks you to look for a missing relative last seen at a real place. A sign there points to a second place. The relative may be alive (bring them home to join, or leave food and word), turned (put them to rest and bring back a keepsake, let your survivor do it themselves, or say you found nothing: a lie a witness may reveal later), or gone (one more place to try). |
| 📻 An old acquaintance | A voice on the radio leads a group (the raider faction, if there is one). One of your people knows him: a handler (if they're a Saboteur), a cellmate, an ex, an in-law, a foreman, an old friend. A kid walks a note to the gate. A spy can be exposed, exiled, forgiven, or used to feed him lies (his raiders really walk up to that wall and fall there; he gets away: +12 ammo, or bury their dead in graves by the wall). Otherwise, pay a debt (10 food), meet him at his camp, or ignore him. It ends in a truce (give 3 medicine or 12 food; faction relation +25), bad blood (he takes up to 6 food; relation −20), or your survivor leaving with him. |
| 🚁 The evacuation rumour | The radio announces an evacuation from Checkpoint Echo (or a distant farm or town) at dawn in three days. Send your best scout on a real scouting trip (you hear what's there when they're back), or stay. It is real (65% if the military truth is behind the outbreak, else 35%), a trap, or already gone. If it's real, be there between 04:30 and 09:30: a helicopter stands on the pad, rotor turning (every dead thing around hears it), with 2 or 3 seats for the most vulnerable (children, the old, the frail, the sick), and they leave for good (the radio later says they made it). A trap means armed men step out: hand over your packs or fight your way out. A real pad counts as an outbreak clue if it's the army's doing. |
| 💊 Medicine for … | A child in the group, or a parent and child at the gate, has diabetes, asthma or a kidney infection. You have 4 to 4½ days to bring insulin, an inhaler or antibiotics from the hospital, supermarket or lab. Take all of it, or only what's needed (+3 Trust). Then comes a day and a half of recovery at home. While ill (and while recovering) the child is on light duty: bench work at the workshop or the kitchen instead of heavy jobs (🩹); only a flare-up, the last 12 hours before the illness turns, keeps them in bed. If time runs out, 3 medicine buys a day and a half, once. Otherwise the child dies. |
| 🕯️ The congregation | A grieving or unhappy survivor keeps listening to the cult's broadcasts (from the Old Stone Church if the map has it) and wants to go to a meeting. Let them go (a real trip there and back by dark) or forbid it. Then an invitation (brought back from the meeting, or asked on the radio): visit, and find the dead chained in the cellar, washed and sung to. Leave them be, tell them the truth (with good Trust someone may follow you home), or burn the cellar (smoke rises over the place for hours; the cult never forgives it, and your survivor may leave). If nobody goes, an unhappy survivor may join them. |
| 🥼 Dr. Varga | A feverish scientist broadcasts from the lab (or the radio tower or hospital). Reach her within 5 days, or refuse twice and the broadcasts stop. Bring her in (she joins as a medic with Medicine 8), or take her notebooks. What she knows goes into the outbreak journal as a true clue. She asks for 4 medicine to try a serum: 55% chance of one Antiserum, whose method she reads out over the radio. Or make her answer in front of everyone for her part in it: exile her, or let her work it off. |
Everyday situations
Besides the random deck, the camp produces situations assembled from parts: who (picked by job, trait, grief, friendship or need), where (a real place or a spot in camp), what, and a complication. At most one arrives every 8 to 15 hours, between 08:00 and 22:00, when things are calm. Each one has its own cooldown of 3 to 8 days.
The 29 situations: who eats first, a jug of water, not enough medicine, pulling their weight, not going up the tower, elbow room, a missing photograph, someone who won't get up, someone from home among the dead, a letter to leave somewhere, a birthday, the cough, doctor's orders, too much time together, an exile who came back, a dead friend's things, graves for the dead, a broken tool, a bottle from the ruins, prayers at supper, a child's question, a hidden injury, cards for rations, a rumour about you, a volunteer who wants to go alone, a visit home, a past decision brought up at supper, extra portions for someone hurt, and someone who worked through the night.
The 9 complications change how an answer lands:
- a witness (kind people mind harsh calls, Hotheads mind soft ones)
- a friend standing beside them
- fresh grief
- the food count everybody knows
- they only joined days ago
- they're still hurt
- a past decision of yours
- rain through the roof
- it being past midnight
Other event machinery
- Every event is a card with choices. Some choices lead into a follow-up card (branching dialogue: a thief's reason, a deserter's grievance, questioning a stranger, haggling with raiders).
- Waiting decisions from the random deck, bites and quarantine check-ups are kept in saves. So are storyline beats, which come back by themselves. See Saving.
- Notes from the dead turn up in abandoned camps (see World). The radio carries rumours, distress calls, chatter and storyline broadcasts (see Radio). The leader's journal writes an entry every evening (see Chronicle).
The world
World & nature
Every map is generated from its seed: hills and forests, mountains with cliffs, rivers with fords and bridges, lakes and ponds, marshes and meadows, and the towns, farms and landmarks between them. Nature decides where you can walk, what you can see, and where the dead can follow.
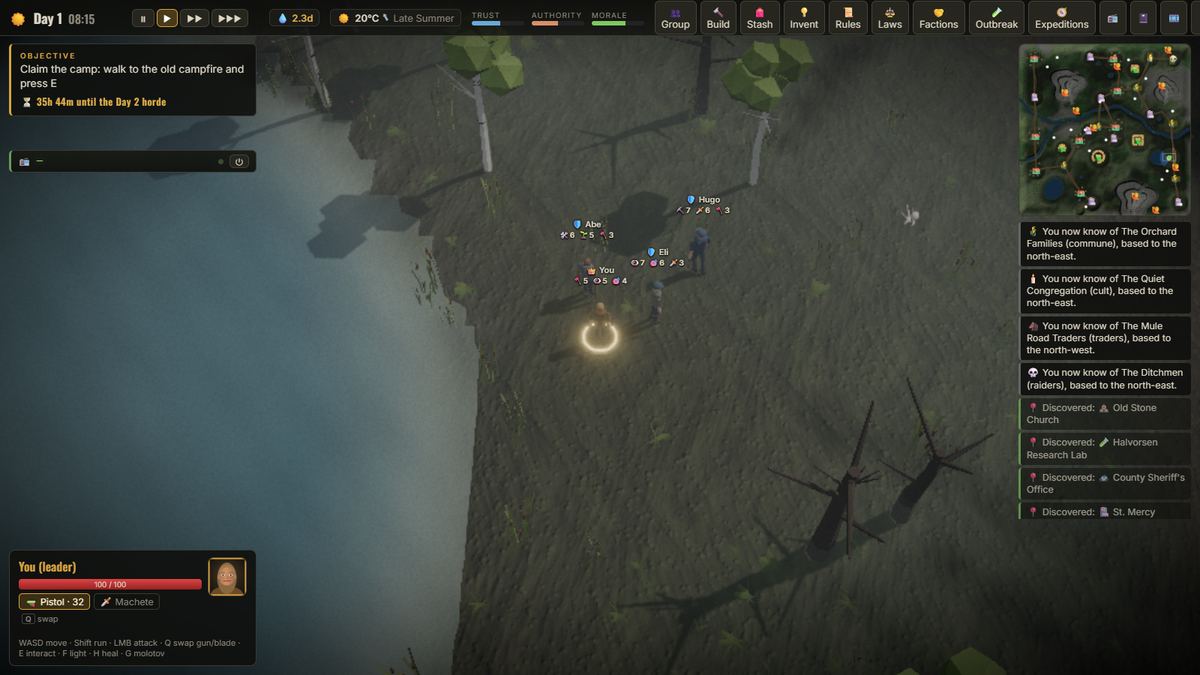
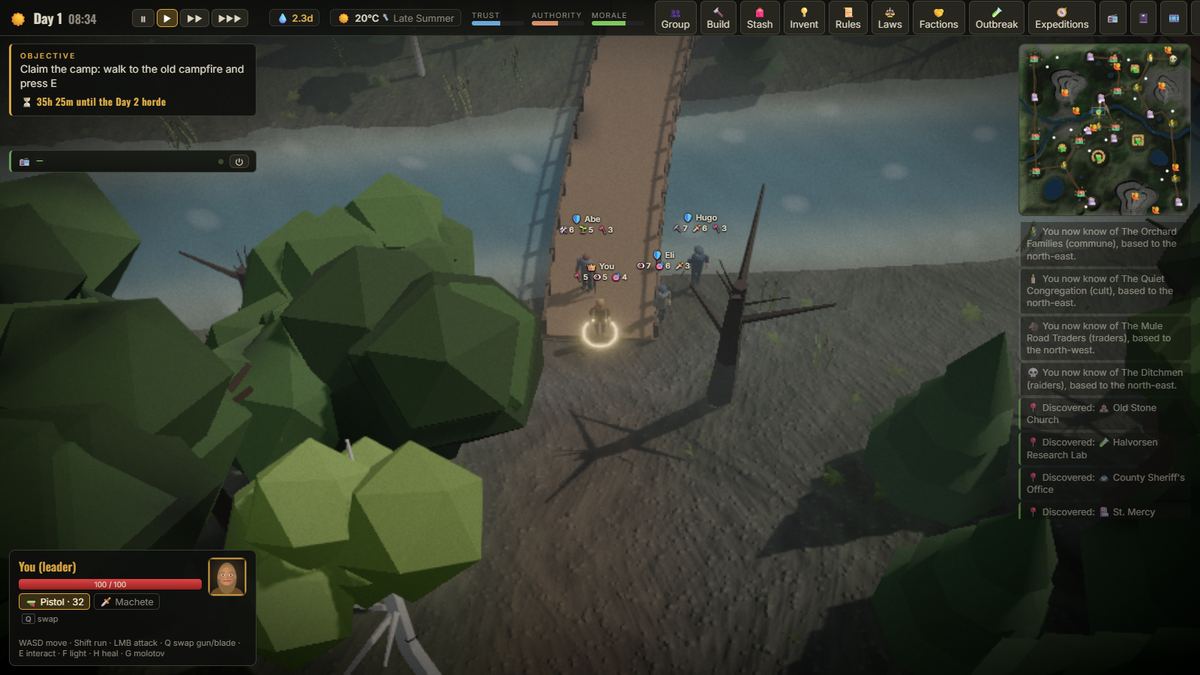
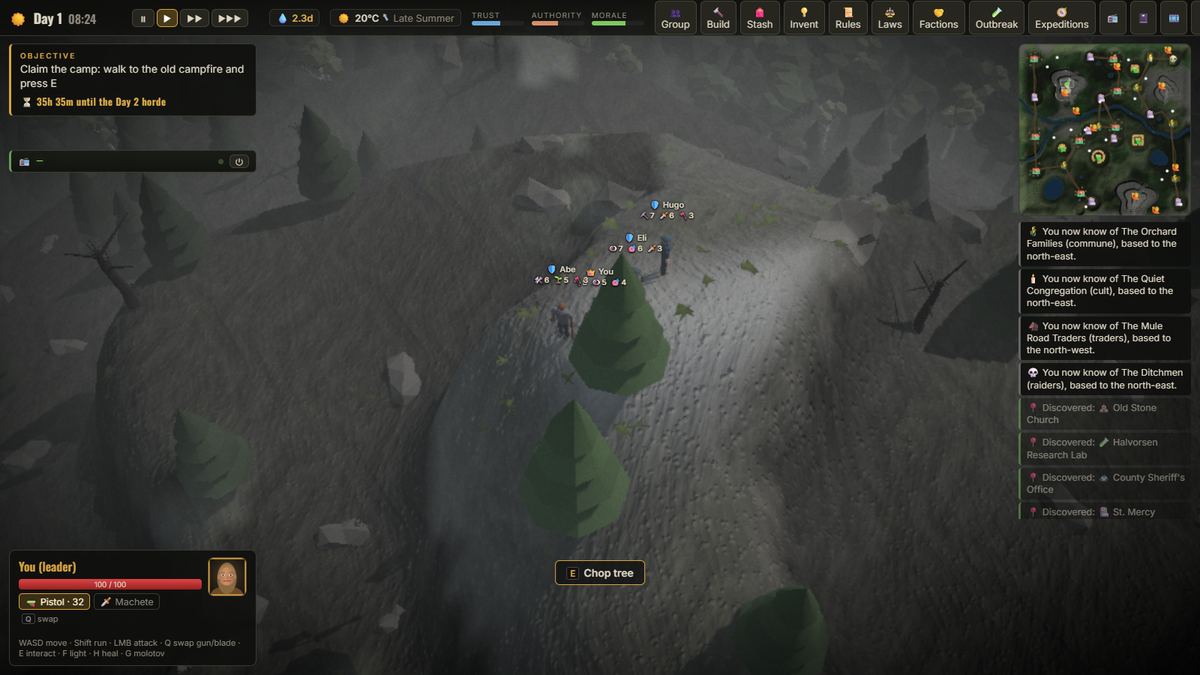
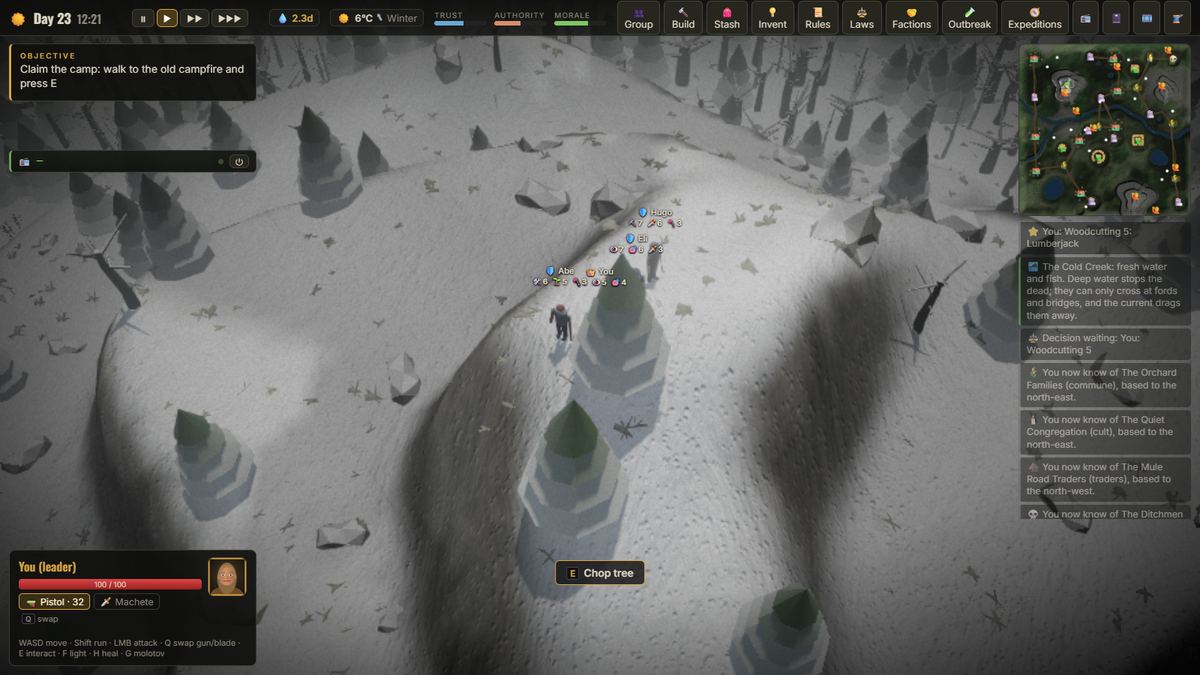
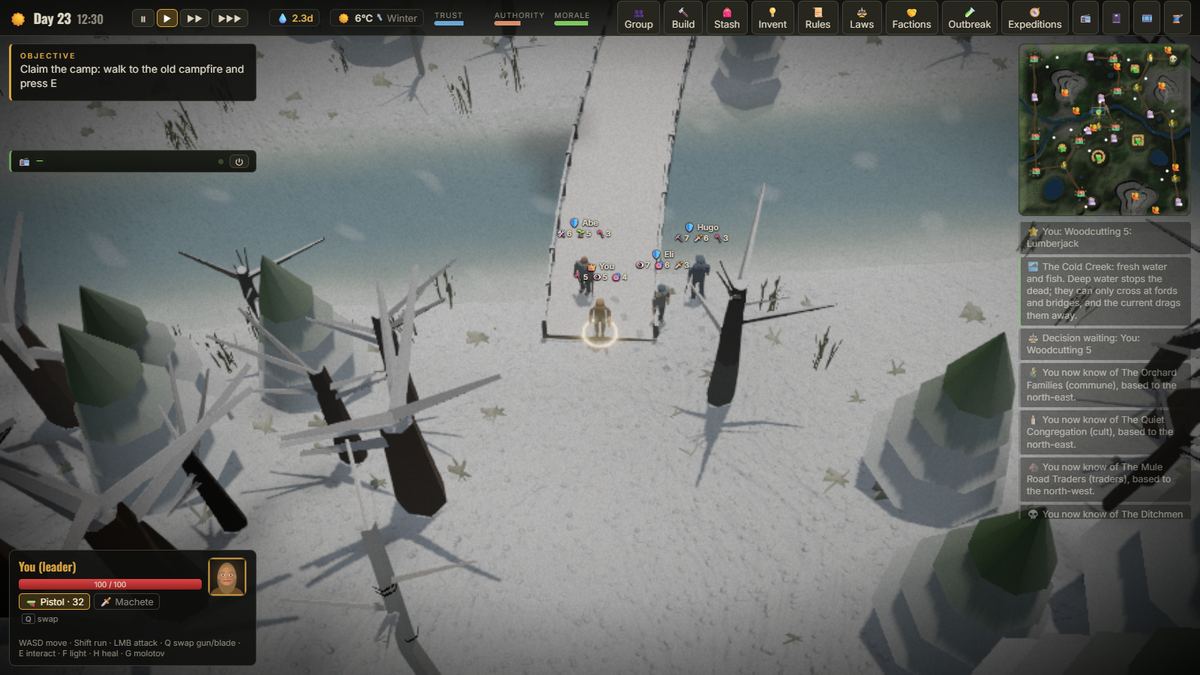
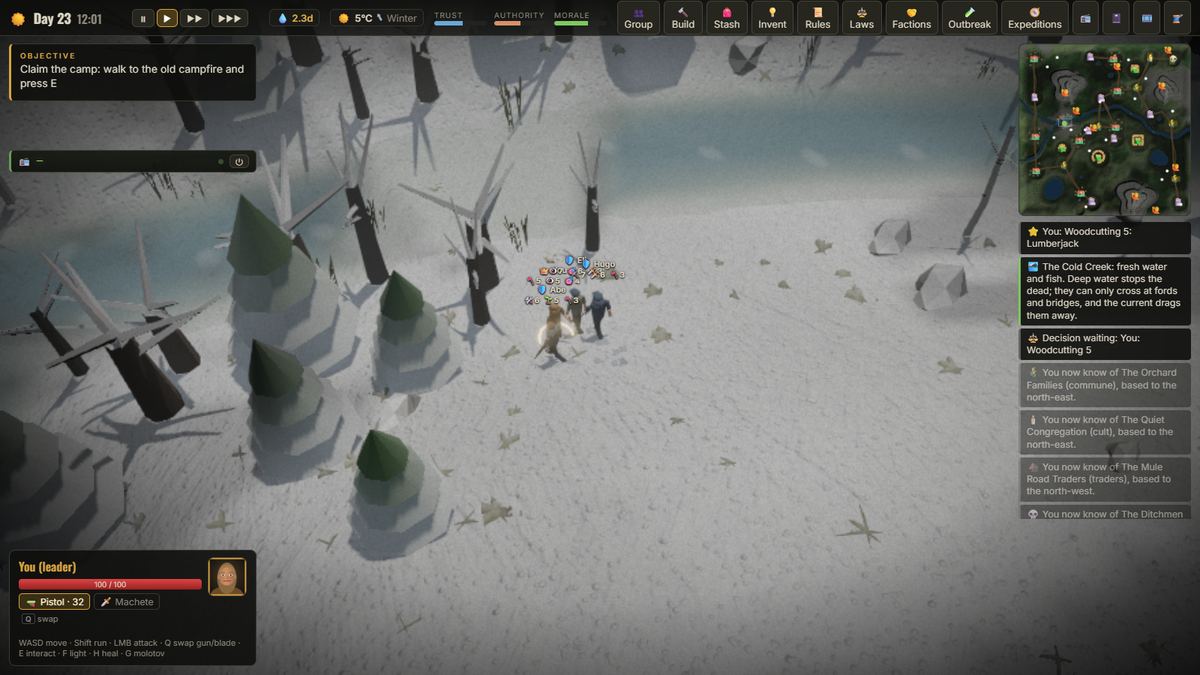
The map
- A square of 384 m to 1 km (640 m by default). You start at the southern edge, and the main camp lies to the north. There are towns, farmsteads, lone cabins, wreck-strewn roads, 8 named landmarks and 3 to 5 abandoned camp sites (up to 7 on a Huge map). Bigger maps have more of everything.
- Every camp site, town, farm, landmark and summit can be reached on foot from the start. Where a river or cliff would cut one off, the generator opens a ford or a scramble path.
- Resource spots: trees (26 to 40 wood), dead trees (12 to 20), rocks (22 to 40 stone), wrecks (18 to 30 scrap, searchable once), crates (searched once), berry bushes (5 to 9 food) and farm crops (3 to 6 food).
- 9 to 11 survivors are waiting at the start, hidden in towns, farms, cabins, wrecks and the wild. About half are pinned down by 3 to 7 zombies. Between 08:00 and 17:00, every 10 to 16 hours, someone may fire a flare somewhere at least 50 m from camp: another survivor to find.
- The minimap shows unexplored places as gold ? marks, one per area. Once explored they become icons, named while you hover the minimap. The first time you see a river, lake, pond or mountain, you get an alert with its name.
Mountains
- Every map has 1 to 5 massifs (more on bigger maps). Some pair up with a lower shoulder peak into a small range with a saddle between them. A summit stands up to 62 m above the ground around it.
- Each massif rises in three terraces separated by cliff bands that nobody can climb, living or dead. Two ramps about 7 m wide wind up to each summit. Long trips are routed to the foot of a ramp.
- Height is sight. Above 14 m, your people see farther: +1/30 of their range per metre, up to 2.3× their normal range. From a peak you can see across the valley. Line of sight still has to clear the hills in between.
- Roads go around mountains and lakes rather than over or through them. Rocks are much more common on mountains and in rocky highland.
Rivers, fords and bridges
- A 384 m map has one river 70% of the time. Bigger maps have none (15%), one (50%) or two (35%). A second river is a tributary that joins the first. Rivers run edge to edge and meander.
- Deep water stops your people completely. They cross at fords (2 on a main river, 3 on a long one, 1 or 2 on a tributary), at bridges (wherever a road crosses water), or over a frozen lake. Pathfinding routes long trips over the best ford or bridge.
- Wading through a ford or the shallows is slow: 55% speed for your people, 45% for the dead.
- The dead can't swim. A zombie in deep river water makes almost no headway (4% speed). The current carries it downstream at about 1.3 m/s and pulls it into the channel. It washes up at a ford, or is swept off the map for good. In a lake the dead flounder at 15% speed. On a bridge they walk at 85%. A river is a defensive line whose weak points are its fords and bridges.
- You can't build on water, cliffs or bridges.
Lakes and ponds
- A few lakes (radius 12 to 26 m, up to 30% larger on big maps) and several ponds (radius 5 to 9 m) sit in low ground, fringed with reeds.
- They are water and fish (see below).
- In winter they freeze solid: everyone can walk across, the dead included (on ice at 80% speed). Pathfinding uses the ice while it lasts. Fishing and fetching water still work, but more slowly, through holes in the ice.
Biomes
| Biome | Looks like | Effect |
|---|---|---|
| Countryside | Mixed fields, scattered pine and dead trees. Camps, towns and farms always sit in it. | None. |
| Marsh | Low, wet, dark olive ground with dead trees, birches and mist. | Your people move at 75% (the dead at 70%). Every hour spent in marsh or wading counts up. Past 1.5 hours there's a 7% chance per hour of catching a cold (3% with a Warm Coat), and past 2 hours morale −2. It wears off at half the rate once they're out. |
| Old-growth forest | Dense, dark canopy of big broadleaf, oak, birch and pine. | Trees block sight more (taller occluders), and people inside see 10% less. It's good cover and bad lookout. |
| Rocky highland | Grey-green ground, sparse pines, lots of rock. | Stone for quarriers. |
| Meadow | Bright grass, wildflowers, few trees. | People standing in it see 12% farther. |
Water and fish
- Water Carrier (a job): walks to the nearest explored shore within 170 m of camp, fills jugs (one water per 4 work, at Farming-skill speed; slower through ice), and carries a full load (their carry capacity) home.
- Raw water. River and lake water is dirty. The camp keeps track of how much of its water is raw, and the 🪣 widget shows it. Every raw serving that gets drunk has an 8% chance of giving someone in camp food poisoning. Raw water gets cleaned every hour: a Campfire boils 3 (burning 1 wood per 3), each Sand Filter cleans 6, and a Water Purifier 30.
- River Intake: +3 raw water per hour if it stands within 14 m of a shore.
- Fisher (a job): fishes from the nearest explored shore within 170 m that still has fish. Each catch is 1 or 2 food (40% chance of 2), and they bring home up to 8. Without a Fishing Rod they use a hand line at 40% of the speed: the rod catches 2.5× more. Catching is slower as a water empties (35% of full speed when fished out). Ice fishing and water below 4°C each make it 30% slower. Rods are crafted, and turn up in 5% of crates.
- Fish stocks: every river, lake and pond has its own. A river has 60 + its length/10, a lake 25 + 3 × its radius, a pond 12. Each catch takes one, and every midnight a water regrows 20% of its full stock.
Seasons you can see
The seasons in Needs & weather also change the world, gradually:
| Around | What changes |
|---|---|
| Day 6–12 | Broadleaf trees and grass turn autumn colours. |
| Day 10–20 | Leaves thin and fall. Reeds go straw-coloured, and the wildflowers are gone. |
| Day 20–22 | Broadleaf trees stand bare. Pines stay green. |
| Day 22–25 | Snow covers the ground and the trees. At full cover your people move 15% slower and the dead 25% slower. From about Day 23, everyone leaves footprints: your people always, and the dead you can see. They fade over several hours. |
| From about Day 24 | Lakes and ponds freeze solid (rivers don't). |
Below 1°C, rain falls as snow.
A world that moves on without you
- Each midnight, other scavengers empty some caches (28% of crates) in towns more than 70 m from your camp that you aren't watching.
- Houses far from your people sometimes burn (a 1 in 28 chance each hour). A smoke column rises for 3 to 6 hours and destroys the crates inside.
- From Day 2, each day has a 40% chance of a dead camp appearing: a collapsed tent, two crates guarded by three shamblers, and a note from whoever died there. The note may also be a clue.
Out of the walls
Missions
You can send people out to do a job without you: scout a place or a route, scavenge, clear a place of the dead, rescue someone, trade, follow a rumour, carry goods to another camp, or run an errand. They really go: they walk out through the gate, along the way you planned, search the real crates, fight the real dead, sleep in a real ruin, and come back (or don't). And unless they carry a radio, you hear nothing until they're back or you find them.
Planning a mission (Shift+N)
Press Shift+N (or 🧭 Plan a mission on the big map, or in the 🧭 Missions panel). The big map opens with the planner beside it. You plan at a camp: you must be at the camp they leave from, or in radio contact with it (the deputy hands out the kit). Your deputy never sends anyone out on their own.
- What: 🔭 Scout an area · 〰️ Scout a route · 🎒 Scavenge · ⚔️ Clear · 🆘 Rescue · 🤝 Trade · 🙋 Recruit · 📦 Supply run (with two camps) · 📌 Errand.
- Where: click the map to set the target. It snaps to something you know when you click near it: a person you've seen (Rescue), a group's camp (Trade), a rumour, flare or distress call (Recruit), a place. Then click to add waypoints on the way (a route for Scout a route). Drag a point to move it, right-click it to remove it. The amber line is the way they'll really walk (round rivers by fords and bridges); a red ✖ marks a leg with no way on foot, which they'll skip.
- Who: click faces. The badge is the skill that matters for the job; the hover shows health, tiredness and weapon; greyed faces can't go (and say why: bitten, one leg, exhausted, badly hurt, not at or near this camp, on a supply run, in your party). ⚡ Suggest a team picks the best for the job (it keeps your deputy and medics home and doesn't send two who can't stand each other). Friends and rivals picked together are shown (🤝 / ⚡).
- Gear: each member's weapon, sidearm, armour and pack, from the stash of the camp they leave from (click a slot; broken items and two-handed weapons for someone with one hand aren't offered). Guns get rounds of their own calibre from the stock (−/+). For the team: food, water, bandages, medkits, a walkie-talkie and (to clear a place) molotovs. ⚡ Suggest gear fills it all in sensibly: the best gear the stash has, food and water for the trip, three magazines.
- Rules: 🤫 Stealth (sneak, fight only what comes for you, blades first), ⚔️ Aggressive (put down whatever is in range), 🏃 Avoid (go round, fall back); loot detours (none, 15 m, 40 m); turn back if someone is hurt or bitten, or (with no radio) come back early with urgent news: a raiders' camp nobody knew of, a herd heading for the camp; be back by (dusk, +6 h, +12 h, tomorrow noon, or no limit); at night hole up or push on; bring back everything, food and water, ammo and medicine, or materials (the rest is left in a bag where they found it).
- What you know: the time (out, the job, back, and nights holed up) and the risk, worked out from your map: unexplored ground, herds and raiders you know of near the way, landmarks on it, walking after dark, the weather, how well armed the team is, going alone. It's an estimate from what you know, not the truth.
Out there
- They gather at the gate, leave in single file (a wedge when aggressive) and walk the planned path. The lead waits for anyone falling behind; a stretch they can't get through is gone round.
- They search crates, wrecks and bodies near the way if the rules allow the detour, and at a scavenging target everything within about 38 m until their packs are full. Pack room is 12 plus the pack (a backpack +15, a rucksack +30), minus the food and water they carry; rounds are light, medicine half weight. What doesn't fit goes to a teammate with room, and the rest is left in a bag where it was found. It's really there.
- The dead they meet are the real ones: sneaking they're rarely seen, walking past they're noticed more often, the aggressive put down even the sleeping. A fight costs rounds (the shots are heard: "Gunshots to the north" may be all you hear of them), wear, and sometimes a hit or a bite. A pack of five or more makes a careful team back off. They hide from a herd and slip past (or get robbed by) a raiders' camp.
- At night (19:30–06:00) they hole up in the nearest cabin, farm, ruin or hollow, one keeping watch, unless the rules say push on. They drink and eat from their packs; wounds get bandaged from them. Out of food they go hungry (−15 morale, −10 health a night).
- They turn back when the rules say so: someone below 40% health or bitten, half the team lost, the time to be back, three days out, or no water. The job done, they come home: to the camp they left from, or the nearest camp you still hold if theirs has fallen.
- Near you or a camp everyone is fully simulated. Far away the team walks on in time with its models hidden; walk up to them and they're simply there, doing their job.
News, radio and the map
- No radio, no news. While they're out of touch nothing about them reaches you: no alerts, no bite or funeral cards, no dot on the minimap, no name tag; the roster says "no news since 09:10". The big map shows the planned route, where they were last seen (leaving the gate, the last radio call, or where you met them) and a faded "expected around here now?" ghost, worked out from the plan; its circle grows the longer you don't hear from them. A mission 2 hours past its expected return is overdue; if nobody comes back a day after that, they are presumed lost.
- With a radio. A walkie-talkie with them and one at a camp (within 300 m of them, anywhere with a Radio Mast) that you are at or in touch with, or one in your own pack within 300 m: short check-ins arrive ("At the farm. Two walkers. Moving on."), their live position shows, what they see reaches your map at once, and you can 📻 call them back (from the 🧭 Missions panel; while you're away, your deputy passes it on).
- Meeting them. Walk up to a team out there (or right-click one of them: Talk to the team): you hear everything so far, their trail goes on your map, and you can tell them to carry on, come home now, or come with you (they join your party).
- Bodies. Someone killed out there lies where they fell with their gear beside them. Finding the body is how you hear of it, if nobody came back to tell you.
The debrief
They report to the camp, not to you: when they're back and you're at that camp, the debrief opens. If you're away and out of radio contact with that camp you hear nothing: their report, their trail and what they saw wait there until you walk in (the "While you were away" brief links to it); with a radio link to the camp the news reaches you, the debrief when you're there. It shows the route they really walked over the plan, with numbered markers for what happened; the timeline, with times and places; what they brought back (now in the stash and stock of the camp they came back to), what they left or lost; the intel, now on your big map (📋 reported, with its age); and the people, with what happened to each. The ground they walked through is now ground you know. The 🧭 Missions panel keeps the last twelve reports.
Scouts: people responsible for an area
On the big map, 🔭 Scouts opens the scout sectors of the camp you're at. A sector is an area a scout (or a pair) is responsible for:
- Draw it: ✏️ Draw a sector, then click the map (three points or more: a loop they walk round; two: a road they walk out and back; right-click takes the last point back). Or pick a quarter round the camp (north, east, south, west: about
R + 35toR + 80m out: a round of about three hours). Drag a point to move it, right-click a point to remove it. - Who: click one or two faces (the badge is their Scouting). One sector per person; not someone with one leg.
- Schedule: Dawn & dusk (06:30 and 15:00) · Every 6 h (07:00, 13:00) · Every 4 h (07:00, 11:00, 15:00) · All day (a round, half an hour's rest, the next) · Once · Off. No round starts before 06:00 or after 18:30, or when it couldn't be back by 19:30; the panel shows how long a round takes (the way round at a sneak or a walk, a third more for stops).
- A round may take at most 2–5 hours (4 by default). Walking round a sector takes real time: about 90 m of ground an hour at a walk, half that sneaking; a sector too big for the time allowed is refused, with the time it would take.
- Rules: 🕊️ avoid fights (they hold fire and walk on; only what lays hands on them gets fought), 🤫 sneak, 🧟 come back with herd news, 📻 take a walkie-talkie (only when one stays behind in the stash, or with a Radio Mast).
The scouts own their area. When a round is due, the scouts at camp who are fit (not hurt below half, bitten, exhausted, on the watch, in your party or out on something) set out and walk the points in order, their own way between them, the second behind the first. A point they can't get to is skipped (and noted), a leg that takes far too long is given up, and four of the dead coming for them in turn ends the round early ("too many of the dead out there"). Between rounds they do their own job. The Jobs board and the roster mark them 🔭.
What they report: herds (from then on tracked), people and groups on the move, a group's camp, the dead in groups of three or more, and unsearched crates and wrecks. How it travels (nothing else carries it):
- With a walkie-talkie, within 300 m of the camp with one there (or anywhere with a Radio Mast there), they call it in as they go: "📻 Mia (North sector): a herd of ~150 120 m north, moving south-east". It reaches the camp; you hear it at that camp or in radio contact with it.
- Without one, they tell the camp when they walk back in. A scout with no walkie who sees a herd that could come by the camp cuts the round short and hurries back to tell them.
- A report reaches the camp, not you: the camp acts on it (the herd policy) while you're away, and you learn of it when you're back or on the radio with it.
A scout out there is out of sight. With no walkie in range they have no dot on the maps and no name tag; the roster says "out, no news since 09:40"; the big map marks where the camp last knew them. News about them (a fight, a bite, a death) waits for their report. A bite is told when they're home.
When a scout doesn't come back. An hour and a half after the round should have ended the sector is OVERDUE: "Mia hasn't come back from the North sector (expected by 11:00). Last known leaving at 08:30." The group proposes a search, and 🧭 Send a search team (in the sector or the Goals panel) sends a scouting mission to where they were last known. If their walkie goes dead mid-call, the camp knows something happened (MISSING) and where. A scout who died out there is only known to be dead when someone finds the body (within 14 m), or when they are presumed lost a day after going overdue; their gear lies where they fell.
Beyond the walls
Factions, radio, expeditions
Factions (🤝, K)
Every game has raiders and traders, plus a cult or a commune, and 60% of the time both. They live in towns or farms at least 70 m from your camp, as far away as possible. You learn of them when you explore their home or when they visit. They only visit after you claim a camp, between 08:00 and 17:00. They get stronger with the days, not with your wealth.
| Faction | Start | What they do |
|---|---|---|
| 🐴 Traders | Relation +10, strength 5. First visit on Day 2. | Visit to trade every 44 to 64 hours while relation is above −30. Deals include 10 scrap → 15 rounds of the calibre you're shortest of, 12 food → 3 medicine, 20 wood → 8 cloth, 15 scrap → a pistol, 25 scrap → a crossbow with 10 bolts, 10 food → 6 fuel (4 are offered each visit). Help: 10 rounds on credit (for the guns you have). |
| 💀 Raiders | Relation −20, strength 6. First contact on Day 3. | First a scout watches the camp (shoot him, let him go, or talk). Then they demand tribute: 6 + 2 × day food, 4 + day rounds (any calibre) and 1 + day/3 medicine by the next night. Pay, refuse (they raid the next night), or negotiate (a counter-offer at 60%, or a bluff that works Authority × 0.8% of the time). Strength grows every second day (up to 30). |
| 🕯️ Cult | Relation 0, strength 12. First visit on Day 4. | A preacher asks to speak. Then they offer protection (4 medicine now) or take a volunteer. They try to lure unhappy people (morale below 28) away. Strength grows every third day. Help: +4 morale for everyone. |
| 🌾 Commune | Relation 0, strength 14. First visit on Day 4. | An envoy proposes a pact for 6 food. Later they ask for medicine or come to trade (10 wood → 8 food, 3 medicine → 14 food, 8 scrap → 6 cloth + 4 herbs). Help: 50% they send someone to join you, otherwise 14 food. |
- Raids come at 23:00: the raiders walk up from their side, and the fight is resolved when they reach your walls (see Visitors). Your defence is added up from armed people inside the territory (guns with rounds of their calibre count most), guards, watchtowers of either kind (and more if manned), a fully closed perimeter (+5) and a gate (+2). It is compared with the raiders' strength. Clearly stronger: they're repelled and lose fighters. About even: they damage a wall or gate, steal 15% of your food, ammo, medicine, scrap and fuel, and wound someone. Weaker: they steal 35%, damage two walls or gates, and may kill someone. Every raid is loud (55 m). At war they come back every 2 to 3 days. Destroy them (strength 0) for 15 ammo and 20 scrap.
- Panel actions: Gift (8 rounds of any calibre for raiders, 8 food for others; it waits by your gate until their runner walks over and carries it home: relation +10 then; if nobody opens the gate it goes back into the store). Trade (traders and commune, refused below −20; if their trader can't come right now, you're told so and nothing opens). Ask for help (not raiders; needs relation 40+, once per 48 hours, relation −8): the commune sends a person, the traders a runner with 10 rounds, the cult a messenger with prayers, others a runner with 14 food; it counts when they reach your gate. Declare war, or sue for peace (10 food + 10 ammo, impossible below −80).
- Relations drift half a point toward zero every day.
The radio (📻, O)
A handheld radio picks up a broadcast every 2 to 5 hours, typed out with static. Lines that name a place drop a marker on the minimap for 6 real minutes. Click the text to look there.
- Distress calls: someone is trapped at an unexplored spot more than 50 m from camp, pinned by the dead. Not more often than every 30 hours.
- Rumours about unexplored landmarks, towns and farms, by the names on your map (a pharmacy nobody got to, a gun safe, fuel…).
- Storyline broadcasts: a rival group, an evacuation notice, a scientist asking for help (see Threads).
- Weather talk, herd sightings, faction chatter, and the looping emergency broadcast.
The Radio Mast building is different: it draws a stranger to your gate every 8 hours (every 4 with Radio Network).
Expeditions (now missions)
The old expeditions, where a team vanished for a few hours and a dice roll decided what came back, are gone: people you send out now really walk there (see Missions). The 🚚 Places panel lists the landmarks, towns and farms you know with a Plan a mission here button, and the vehicles. An expedition still out in an old save comes back as before.
Vehicles
- A rusty pickup waits at the gas station (12 fuel) and an army van at the checkpoint (no fuel). Both need repair. There is also an abandoned pickup on a road (6 fuel, 35% repaired) and, half the time, a delivery van (4 fuel, 20% repaired).
- Repair: stand next to it and press E. It costs 15 scrap once. Then stay still within 4.5 m. Progress per second is
2.5% + 0.6% × Building. - Drive with E, then WASD. Top speed is 17 m/s for the pickup and 14 m/s for the van, reverse 6 m/s. People following you (the Escort job or a follow order) within 16 m of the vehicle climb in: up to 4 in a pickup, 6 in a van.
- Cargo: everyone's loads go into the vehicle (60 units, items count as 2). It unloads by itself when you drive slowly (under 3 m/s) inside your territory. Entering a vehicle inside the territory refuels it from camp fuel, up to 40.
- Hitting things at more than 5 m/s damages the vehicle. Running over the dead (above 2.5 m/s) deals
7 × speeddamage. A wrecked vehicle drops to 30% repair and needs 15 scrap again. Headlights light 30 m ahead at night.
Landmarks
Eight named places, each guarded by the dead at level 2. Crates inside a landmark roll extra loot from its table. Once per day (it resets at 06:00) you can press E inside to search for records: a 70% chance of a clue, otherwise a few supplies.
| Landmark | Danger | Resources found (chance, amount) | Items (weight) |
|---|---|---|---|
| 🏥 St. Mercy Hospital | 6/10 | medicine 90% (2–6), cloth 60% (2–6), herbs 30% (1–3) | Medkit (3), Bandage (5), Antiserum (0.4) |
| 🚓 County Sheriff's Office | 6/10 | 9 mm rounds 90% (8–20), 12-gauge shells 50% (4–10), scrap 40% (2–5) | Pistol (3), Shotgun (2), Riot Vest (2), Hunting Rifle (1) |
| 🪖 Military Checkpoint Echo | 9/10 | .308 rounds 90% (10–25), 9 mm rounds 40% (5–12), fuel 60% (5–15), medicine 40% (1–3) | Hunting Rifle (3), Riot Vest (2), Medkit (1) |
| ⛽ Route 9 Gas Station | 4/10 | fuel 90% (6–16), scrap 60% (3–7), food 40% (2–5), water 50% (3–8) | Crowbar (2), Backpack (1) |
| ⛪ Old Stone Church | 3/10 | food 60% (3–7), cloth 60% (3–7), water 40% (3–6) | Bandage (3) |
| 📡 KBRN Radio Tower | 5/10 | scrap 80% (4–9), metal 30% (1–3) | Hammer & Nails (1) |
| 🧪 Halvorsen Research Lab | 7/10 | medicine 70% (2–5), scrap 60% (3–7), metal 40% (1–3) | Medkit (2), Antiserum (0.8), Scavenger Kit (1) |
| 🛒 FoodMart Supermarket | 6/10 | food 95% (5–12), water 80% (5–12), cloth 30% (2–4) | Backpack (2), Kitchen Knife (2), Baseball Bat (1) |
Guards: the checkpoint has 3 Big Ones, 8 shamblers and 3 runners. The hospital has 9 shamblers and 3 crawlers. The lab has 6 shamblers, 2 runners and a bloater. The police station has 5 shamblers, the supermarket 6 shamblers and 2 crawlers, and the others 2 shamblers each.
The outbreak mystery (🧪, M)
Each world has one hidden truth behind the outbreak, fixed by the seed: a lab leak, a military bioweapon, contaminated water, or a parasitic fungus. Clues come from landmark crates and searches, notes from the dead, and expeditions. Each truth has 5 clues, and 3 red herrings are mixed in. Some storylines add first-hand accounts too (a scientist who knows what happened, a working evacuation pad); an account that points at the real cause counts as a true clue.
- 2 true clues: a theory forms. 4 true clues: the truth is revealed and its ending opens.
- Lab leak: open the cold storage in the Halvorsen Research Lab (E), then stay near the KBRN Radio Tower (within 6 m plus 30% of its radius) for one game hour to broadcast the cure. Field Medicine makes it 20% faster.
- Military: repair a vehicle and drive onto Checkpoint Echo between 05:00 and 08:00 with at least 3 people aboard, you included.
- Water: the Water Purifier blueprint unlocks (30 scrap, 15 fuel, 6 medicine). Keep one standing for 5 days (counted at noon).
- Fungus: three spore nests appear at towns and farms. Stand next to each and press E with 5 fuel or a molotov.
- Any game: keep the camp alive until Day 30.
Each ending shows its own victory text. You can keep playing afterwards.
Records
Saving and the chronicle
Saving
- Saves live in your browser (local storage). There are five slots: Autosave, Slot 1–3 and Ironman.
- The game autosaves every dawn (06:00) and when you choose Save & quit to menu.
- F5 saves to slot 1 and F9 loads slot 1. The pause menu saves to slots 1, 2 or 3 and can load any slot.
- Loading reloads the page and rebuilds the world from its seed, then restores your progress on top. Waiting decisions from the random deck, bites, law notices and quarantine check-ups come back after a load. So do half-rations days and the game speed. Storyline beats are asked again.
- Saves from before rivers and mountains were added (version 1) can't be loaded: their seed now makes a different map. They no longer appear in the load list.
- Refreshing the browser returns you to the start menu; Continue picks up the newest save.
- If the browser blocks storage (a private window, for instance), the game still runs but saves last only as long as the tab.
Journal, chronicle and photos
- Journal (📓, J): at 21:00 each day the leader writes an entry from the day's facts: deaths, bites, newcomers, kills, hordes, what was built or lost, your decisions, the weather, the food, the smell.
- Chronicle (🎞️, Y): a timeline of key moments. Photos are taken by themselves when someone dies, a major building is finished, a horde arrives, you claim the camp, or someone joins. Up to 40 photos are kept while playing and the 12 newest in the save.
- Photo mode (P): pauses the game, hides the HUD and frees the camera.
- The pause menu has volume and music settings. The music follows the mood: day, dusk, night, tension, combat and siege.
Tips
Tips from the field
- Claim the camp early on Day 1. Nothing can be built, stored or cooked before that.
- Put two people on wood and one on building right after claiming, and give everyone "when idle: Builder". The perimeter is what the Day 2 horde tests.
- A Tent before the first night: sleeping rough costs morale and recovers fatigue slowly.
- Water runs out before food does. Keep the old well standing and add a Rain Collector early.
- Guns win fights and start new ones. A rifle is heard 55 m away. At night, prefer melee, crossbows and walls.
- A guard in a watchtower sees 45% further, shoots better, and can't be reached.
- Burn or drag the bodies. Stench lowers morale and draws the dead back.
- Sneak (X) near dozing dead. Pickpocket the ones with pouches.
- Let the group vote on things you don't care about. Trust is what keeps morale up.
- Save Authority for laws, and for the night raiders come knocking.
- Put a scout on the side herds come from, with a walkie-talkie: a herd found three hours out is a quiet afternoon indoors; one found at the walls is a massacre.
- When a herd is due, go quiet: lights, guns and hammering all carry.
- Send expeditions by day with armed, armoured people: night adds risk.
Errata
Known issues
Behaviour in the current build that you might not expect:
- Some one-off decisions are lost if they are still waiting when you save: a stranger at the gate, a funeral, an expedition report, and one-off cards from relationships, factions and everyday situations (romance, feuds, confessions, quests, trade visits, raid reports, perk offers). Storyline beats are not lost: they are asked again.
People
Relationships, laws and quests
Relationships
Chemistry: who works well with whom
Bonds change how the group works, a little and in ways you can see. None of this is a soap opera: every effect is small, and every one is written in the log, on the person screen or in the Chemistry view.
The Chemistry view (🫂 Chemistry in the Group panel's header, or 🫂 Chemistry web on a person's Relationships tab) draws the group as faces around a circle joined by coloured lines: pink partners, blue family, green friends (thicker the closer), red dashed rivals; 💬 Feelings adds faint lines for strong likes and dislikes without a bond, and 🛠️ At work now shows only the pairs working side by side right now. Filter by job to see one crew. The frame of each face is how they see you. Click a face to see only their ties, with both directions of every opinion; click it again for their person screen. Beside the web: the strongest bonds, the feuds (marked same job! when two rivals share a job: split them on the Jobs board), who is working well or badly together right now, and what happened lately. On the Jobs board a 🤝 or ⚡ on a face means a friend or a rival is on that job too (hover for who).
Laws (⚖️ Laws, L)
One law per topic can be in force. The game starts with Equal shares; the founding charter sets the rest when you claim your camp. Each law pleases some traits (+3 to their morale target) and upsets others (−4). Unhappy people can petition to change a law (see Petitions).
The Laws panel groups the laws by topic: 🍖 Food & water (rations), ⚖️ Justice (justice and property), 🩸 The bitten, 🌙 Night & watch (curfew), 🫂 Solidarity and 🏛️ How we decide (the charter's decision rule). Above them is the 📜 Charter group: the founding date, the articles, petitions, your vetoes and each law's history. Each law is a card: the law in force is gold and marked In force. A card lists what the law does, with the numbers (for example "−6 morale for anyone resting or below half health"), which traits it pleases and upsets, and the faces of the people it pleases and upsets, each with how far it moves their morale while it stands. Only traits you know about count, so hidden traits can still surprise you. The support bar is your guess at a vote from what you know. Your Authority and Trust are shown top right.
What the laws actually change:
Personal quests
Once the camp is claimed, at the start of a day (midnight) someone who has been with you at least a day (and hasn't asked in 3 days) may come to you with a personal goal, if fewer than two are running. Promising to help raises their loyalty by 6. Refusing costs morale and, if you say "We can't afford that", opinion too.
Every completed quest also gives +18 loyalty, +20 morale and +20 opinion of you. After the deadline they lose 6 morale per day. A day later they give up: −15 loyalty, −12 morale, −18 opinion. Quest targets show on the minimap (📜) and in their details ("Show on map").